googleads

Wednesday 29 June 2011

Dolly is about to Depart.

IMG_0488
                                      SOLD
Yes it was inevitable but ‘Dolly’ has found a new home. I’m sure she will be loved, cherished and treasured. I’m sure she will become as much a part of the family as the faithful dog, the tatty old slippers and the ticking clock. I will miss her though I spent many hours creating her and loved working with this colour combination.
212-1248_IMG


From humble beginnings………
IMG_0116
I would still make Dolly again despite the hours and hours of work involved, by private commission or custom order, contact me for further details.
If you fancy making Dolly yourself then the pattern is available  on ravelry and in my Etsy store.

Tuesday 28 June 2011

Petit’ Peony Granny Blanket

.IMG_0474

The blanket is available in my Etsy store click here.

IMG_0466
IMG_0475
Peonies have long been touted as some of the most beautiful flowers on earth. They were practically revered by the ancient Chinese and were a favorite in Victorian English gardens. They’re still one of the most preferred specimens for floral arrangements because of their color and their delicate petals and scent.
You can read more at Peonypassions.

Friday 24 June 2011

The Art of Yarn

It’s the end of the week and it seems to have flown past, well it did for me. This was probably due to getiing so engrossed in finishing my Tutti Frutti Daisy blanket. Anyway I aften like to put together a treasury of Friday and this weekend’s treasury is ‘The Art of Yarn. The collection is almost entirely crochet – just as it should be. I also think putting together a treasury on Etsy is a good way to support fellow Etsy-er’s, crocheter’s and yarn-o-hollics.
I’m including a couple of the beautiful items below,, please click under the photo to go directly to that shop or

Click here to see the entire treasury of The Art of Yarn.

Long Lacy Opera Gloves - MADE TO ORDER
Orange Rainbow Shawl FREE SHIPPING

Before I go if any of you have Etsy shops then please leave a comment giving the name of your shop and I will be sure to add it to my favourites and feature some of your items in future treasury's.

As ever have a great weekend.

Thursday 23 June 2011

Introducing ‘Tutti Frutti Daisy’ Granny Square Blanket.

Well as promised I’m delighted to be able to introduce and show you my newest creation. Tutii Frutti Daisy blanket – I so love the colour combination here, and hope you do to.
IMG_0420
The blanket is constructed from 7 rows of 7 squares across and 7 rows of 7 square down. A total of 49 squares. Each square has a pink central daisy flower and is then surrounded by 7 different colours.
I think the colour work in this pattern is gorgeous and so very pretty and cheerful. The pattern contains explicit colour guidance for each and every square – so 49 different colour combinations.
The finished blanket measures 54“ x 54“. The blanket could be made larger or smaller by increasing or decreasing the amount of squares used.
IMG_0422

The pattern  is now available in my Etsy store click here

or in my Ravelry store click here.

Wednesday 22 June 2011

A Basket Full of Biscuits

IMG_0377
IMG_0379
They do look so cute don’t they? I love it when they are at this stage all neat and tidy with their ends sewn in and ready to be transformed into a blanket or a cushion or some other item. My technology problems persisted yesterday with a power cut so I was unable to down or upload photos, unable to blog etc. However this focussed me on getting one of my new blankets finshed.
Sneak preview below. All will be revealed tomorrow – technology allowing I’m just doing the final border.
IMG_0406-1
A pile of granny squares all needing their ends sewn in.
IMG_0412-1
A sneaky sepia preview.
IMG_0415-1
A black & white view.

Monday 20 June 2011

Work in Progress – Freeform Crochet Poncho

As you can see this is a work in progress, also known as, a WIP. This little project has lain in my studio for way too many months being ignored, shame on me. It was securely packed away so at least I can say it hasn’t been gathering dust. I decided to take some photographs today so that this may give me the motivation to finally get it completed.  
Unfortunately the weekend brought what seemed like a never ending assault of technology issues which ensured the current 2 designs I’m working on weren’t completed, much to my frustration.  Thus the freeform has now been queued yet again. With wilting laptops, blue screens of death, dysfunctional and intermittent broadband connectivity and a printer that appears to be playing dead, there has been much counting to ten.
IMG_0397
IMG_0400
IMG_0396
IMG_0399
IMG_0404

Sunday 19 June 2011

Happy Fathers Day


Ben – Click to download the pattern from Berroco

Wherever you are and whatever you’re doing I hope you have a Happy Fathers Day. Below I have put together a collection of free patterns for inspiration for the ‘he’ in your life, whoever he may be.

Peter – Click here to download the pattern from berroco


Kyle Boy – Click Here to download from Berroco


Still looking for inspiration – look no further. I recently created a

Fathers Day Treasury on Etsy Click Here to View it.

 Dad and Me -  Family slippers set
Daddy's Little Guy - Father and Son Father's Day greeting card (w/ envelope) FREE SHIPPING


Father Black Cotton Chemistry Periodic Table Element Pillow

Friday 17 June 2011

Easy Artisan Bread Recipe

IMG_0370
Last weekend for some reason I got the notion to make some bread. Perhaps this was as an excuse to lay down my crochet hook for a few hours – which didn’t really happen. Anyway I found this really simple recipe which is so easy to make the only real ingredient required is patience. Anyone who knows me knows that patience is really not my virtue and even I managed this and the results were quite tasty.
I didn’t include any of the herbs as I wanted to see how it tasted before introducing other flavours. It came out really well and next time I would use strong white bread flour rather than just plain flour. Anyway if you need some inspiration for something to do over the weekend give it a try.
Ingredients
  • 3 cups all-purpose flour
  • 1 teaspoon active dry yeast
  • 2 teaspoons salt
  • 1 2/3 cups warm water (110 degrees F/45 degrees C)
  • 1 teaspoon chopped fresh rosemary (optional)
  • 1 teaspoon chopped fresh thyme (optional)
  • 1 teaspoon chopped fresh sage (optional)
Directions
  1. Combine the flour, yeast, and salt in a large bowl and mix to combine. Add the water and herbs, if using, and mix well. The dough will be very sticky and shaggy-looking. Cover the bowl with plastic wrap and set aside at room temperature for 18 to 24 hours.
  2. Generously flour a work surface. The dough will have risen and will be covered in bubbles. Transfer the dough to the work surface and dust it with flour. Fold the dough in half, and then form the dough into a ball by stretching and tucking the edges of the dough underneath the ball.
  3. Liberally flour a kitchen towel (do not use terrycloth). Place the dough ball on the floured towel. Cover with another floured towel. Let the dough rise for about two hours [see footnote].
  4. Preheat an oven to 450 degrees F (230 degrees C). Place a lidded Dutch oven or deep heavy duty casserole dish (with lid) into the oven to preheat.
  5. Carefully remove the hot baking dish from the oven. Remove the lid and gently turn the dough ball into the ungreased baking dish, seam-side up; shake the dish so the dough is more evenly distributed.
  6. Cover and bake for 30 minutes. Remove the lid and bake until the crust is golden brown, 15 to 20 minutes. Remove the loaf from the baking dish and let it cool on a rack before slicing.
Source - Allrecipes.com
While I was busy being patient I managed to get another granny square blanket finishes. A welcome ray of sunshine.
IMG_0372
Anyway whatever you are doing this weekend have a great one.

Monday 13 June 2011

Vintage Granny Square Blanket

What a superb find huh? This isn’t one of my blankets but it it totally sublime and gorgeous all the same. Hope you love it as much as I do.
IMG_0349
IMG_0350
IMG_0344
IMG_0355

Friday 10 June 2011

How to Crochet Granny Squares Together

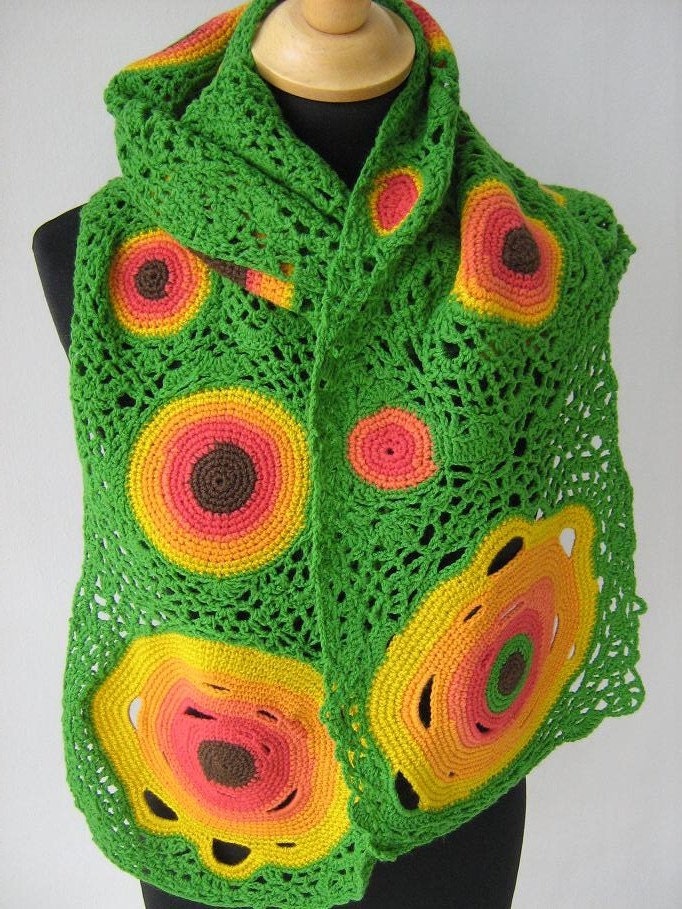
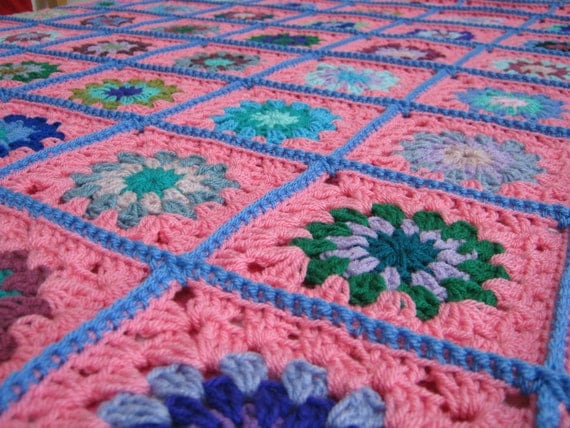
How to crochet granny squares together.

I have recently been asked how to crochet granny squares together and
so an impromptu tutorial. The concept seems much more difficult than the
actual process is. The important things to remember are.

Lay your squares out exactly as the pattern states or as you wish them to
be crocheted together.

Always keep your squares right side facing.

I always work from right to left.

I always crochet together all horizontal rows first and then vertical rows
second.

I always work from the bottom right hand corner and row progressing up
the way, 1 row at a time.
Abbreviations used:
ch – chain
sp – space
sc – single crochet USA, dc –UK


1. Lay out all your granny squares in the exact order that you
want to crochet them together.


2. Make sure that all squares are right side up.


3. Take the first 2 squares from the right hand side of your
arrangement. Place one on top of the other but with both right
sides on the outside.


4. Fasten the yarn in the corner chain tying both squares
together.


5. Hook your yarn and pull through both squares. Chain 1 and
hold the squares in one hand with the backs together. Insert
your hook into the same stitch again. Hook your yarn again and
pull through making 1 single crochet.


6. Continue crocheting the squares together using sc across the
edges of both granny squares into the corner chain at the left.


7. Now get the next 2 granny squares that need to be crocheted
together, again with right sides facing out the way.


8. Work the exact same process as the first 2 squares to be
crocheted together. Insert hook into corner ch of the squares and
begin to work in sc all across.


9. Be sure to leave tails of yarn long enough for ends to be sewn
in.


10. Once you have completed your vertical rows lay the squares
out and then fold in the opposite horizontal direction and begin
the same process again. Always working from the right side to the
left.


11. Crochet across until you reach the corner of the first square,
here you crochet through both corner ch spaces and again into
the next squares ch space. Then proceed to work in sc across the
square.
Powder Pink Large Granny Square Crochet Blanket Afghan Vintage Style 60 x 60