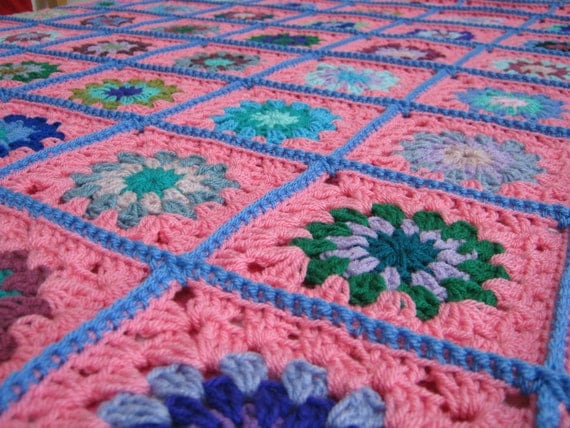
I have recently been asked how to crochet granny squares together and
so an impromptu tutorial. The concept seems much more difficult than the
actual process is. The important things to remember are.
Lay your squares out exactly as the pattern states or as you wish them to
be crocheted together.
Always keep your squares right side facing.
I always work from right to left.
I always crochet together all horizontal rows first and then vertical rows
second.
I always work from the bottom right hand corner and row progressing up
the way, 1 row at a time.
Abbreviations used:
ch – chain
sp – space
sc – single crochet USA, dc –UK
1. Lay out all your granny squares in the exact order that you
want to crochet them together.
2. Make sure that all squares are right side up.
3. Take the first 2 squares from the right hand side of your
arrangement. Place one on top of the other but with both right
sides on the outside.
4. Fasten the yarn in the corner chain tying both squares
together.
5. Hook your yarn and pull through both squares. Chain 1 and
hold the squares in one hand with the backs together. Insert
your hook into the same stitch again. Hook your yarn again and
pull through making 1 single crochet.
6. Continue crocheting the squares together using sc across the
edges of both granny squares into the corner chain at the left.
7. Now get the next 2 granny squares that need to be crocheted
together, again with right sides facing out the way.
8. Work the exact same process as the first 2 squares to be
crocheted together. Insert hook into corner ch of the squares and
begin to work in sc all across.
9. Be sure to leave tails of yarn long enough for ends to be sewn
in.
10. Once you have completed your vertical rows lay the squares
out and then fold in the opposite horizontal direction and begin
the same process again. Always working from the right side to the
left.
11. Crochet across until you reach the corner of the first square,
here you crochet through both corner ch spaces and again into
the next squares ch space. Then proceed to work in sc across the
square.


5 comments:
Lovely ... thank you for the time taken. Its only easy once you have done this once or twice and this is a clear tutorial. Thank you.
Great picture tutorial and I bookmarked this on SU so I can find it in the future. These methods are always helpful for putting a quick granny square project together.
I am really glad I found this! I have been struggling with figuring out how to sew my squares together for a blanket! LOVE the pictures & your squares are beautiful!
This is way too awesome! I have millions of granny squares laying around, and now I've decided it's time to put them together! Thanks for sharing.
What is this type of granny square called? I tried to reproduce it, but it didn't turn out quite right. Could you make a tutorial for this particular granny square? THANKS!
Post a Comment