googleads

Showing posts with label Shawl. Show all posts

Sunday, 23 June 2019

The Sky You Love Shawl

image 0

The Sky You Love Shawl - pattern by Casapinka - yarns by Fearless Yarn. The yarns are available in my etsy store - Click here.

image 1


Completed shawl blocking on my yoga mat.


Monday, 8 October 2018

Hand Knitted Scrappy 'Show Off Boomerang' Shawl


Here are some photos of my scrappy shawl, hand knitted using various leftover yarns. I'm really happy with the finished shawl. The pattern was written by April Klich and is called 'Show Off Boomerang' shawl, you can find the pattern on ravelry and it's available free.


Wednesday, 10 June 2015

Guadalupe Wrap–Free Crochet Pattern


FINISHED MEASUREMENTS:
Wrap measures 54"/137 cm diameter
GAUGE
In mesh pattern, 10 sts = 4"/10 cm and 5 rows = 3"/7.5 cm.
In cluster pattern, 5 cluster repeats = 4"/10 cm and 6 rows = 3 1/2"/9 cm.
STITCHES USED
Chain (ch), double crochet (dc), half double crochet (hdc), single crochet (sc), slip stitch (slip st), treble crochet (tr)
SPECIAL TERMS
edc: extended double crochet:Yarn over, insert hook in indicated stitch or space, yarn over and draw up a loop, yarn over and draw through one loop on hook, [yarn over and draw through 2 loops on hook] twice.
V-st: 2 edc in space between stitches.
V-st in V-st: 2 edc in space between 2 edc of indicated V-st.
Cl: 3-double crochet cluster: Yarn over, insert hook in indicated space, yarn over and draw up a loop (three loops on hook), yarn over and draw through 2 loops on hook (2 loops on hook), [yarn over, insert hook in same space, yarn over and draw up a loop, yarn over and draw through 2 loops on hook] twice, yarn over and draw through all 4 loops on hook.
beg-Cl:2-double crochet cluster: Yarn over, insert hook in indicated space and draw up a loop, yarn over and draw through 2 loops on hook; yarn over, insert hook in same space, yarn over and draw up a loop, yarn over and draw through 2 loops on hook yarn over and draw through all 3 loops on hook.
shell: (2 dc, ch 2, 2 dc) in indicated space.
fan: tr in indicated stitch or space, (ch 1, tr) in same stitch or space.
picot: Ch 3, slip st from top to bottom through all front strands of last stitch made.
NOTES
1. Draped as a cover over an occasional table or as a throw over the back of a chair or worn as a shawl, this round is a lovely, lacy accent piece.  Crocheted in worsted weight NaturallyCaron.com Country, the fabric is soft, resilient and easy-care.  The center of the round is made in a quick crochet mesh, ringed with a striped cluster pattern for color and texture, finished with a “strawberry” lace pattern for a slightly ruffled edge. Change the order of the colors for a different look, or swap out one, two or all three colors as you desire.
2. Fabric is stretchy and will grow in length and block to measurements
3. To change color at end of a round. Fasten off old color. Join new color with slip st in same stitch as join.
4. Cover has three sections: 1) solid color mesh section, worked in joined rounds with RS always facing, 2) three-color cluster section, and 3) lace edging.

SHAWL
Mesh Section
Note: This section is worked in a mesh stitch pattern, placing edc in the space between edc, and increasing 9 stitches each round. If you have difficulty seeing where the increase V-sts are, then mark the increase points and move the markers up as work progresses. Do not turn at end of rounds, RS is always facing.
With A, chain 4; join with slip st in first ch to form a ring.
Round 1 (RS): Ch 1, 9 sc in ring; join with slip st in first sc—9 sc.
Round 2: Ch 3 (counts as one leg of last V-st), V-st in next 8 sc, edc in same sc as beginning; slip st in top of beginning ch (to complete last V-st)—9 V-sts (18 sts).
Mark increase points: Place a marker in the space between legs of each V-st. Move markers up as work progresses.
Round 3: Ch 3, edc in space between V-sts, [V-st in next V-st and move marker up, edc in space between V-sts] 8 times, edc in same space as beginning ch; slip st in top of beginning ch (to complete last V-st)—27 sts.
Round 4: Ch 3, edc in each space between sts to first (marked) V-st, [V-st in next V-st and move marker up, edc in each space between sts to next (marked) V-st] 8 times, edc in same space as beginning ch; slip st in top of beginning ch (to complete last V-st)—36 sts.
Rounds 4–24: Repeat Round 4 twenty more times—216 sts.
Fasten off.
Note: For a larger or smaller cloth, add or omit repeats of Round 4 before starting the cluster section. For the best "math" when setting up the next section, end with an even number of rounds and stitches.
Cluster Section
Notes: This section consists of alternating rows of V-sts (wrong side) and clusters (right side), worked in the following color sequence: 1 row of B, 1 row of C, 1 row of A. Fasten off and change color at the end of each round. Continue to increase at each of the 9 increase points around, moving the markers up to the center st or ch-1 space as work progresses.
Turn work so WS is facing you, join B with slip st in space between legs of last V-st made.
Round 1 (WS): With B, ch 3 (counts as hdc, ch 1), hdc in same space, *[skip next 2 edc, (hdc, ch 1, hdc) in next space between edc sts] 11 times, skip next 2 edc, (hdc, ch 1, hdc, ch 1, hdc) in next (marked) V-st and move marker into center hdc of increase; repeat from * 7 more times; [skip next 2 edc, (hdc, ch 1, hdc) in next space between edc sts] 11 times, skip next 2 edc, hdc in same space as beginning ch, ch 1; join with slip st in 2nd ch of beginning ch (to complete beginning increase), turn—117 ch-1 spaces. Fasten off.
Round 2 (RS): Join next color with slip st in last ch-1 space made, ch 2, beg-Cl in same space, *ch 1, Cl in next ch-1 space; repeat from * around moving increase markers into ch-1 space between clusters, end with ch 1, slip st in top of beg-Cl, turn—117 clusters. Fasten off.
Round 3: Join next color with slip st in first ch-1 space of previous round, ch 3 (counts as hdc, ch 1), hdc in same ch-1 space, *(hdc, ch 1, hdc) in each ch-1 space across to next marked ch-1 space, (hdc, ch 1, hdc, ch 1, hdc) in marked ch-1 space and move marker into center hdc of increase; repeat from * 7 more times, (hdc, ch 1, hdc) in each ch-1 space around; hdc in same space as beginning ch, ch 1; join with slip st in 2nd ch of beginning ch (to complete beginning increase), turn—126 ch-1 spaces. Fasten off.
Rounds 4–10: Continuing in color sequence, repeat Rounds 2 and 3 three more times, then work Round 2 once more (worked with B). At end of last round—153 clusters.
Note: To prepare for the Lace section, the next round needs to end with 160 ch-1 spaces (a multiple of 4). Therefore, it is necessary to omit two of the increases, adding only 7 ch-1 spaces instead of 9. Remove 2 of the increase point markers; select markers that are widely spaced around circle.
Round 11: Repeat Round 3 increasing only at remaining 7 marked increase points—160 ch-1 spaces. Fasten off.
Lace Section
Round 1 (RS): Join A with slip st in last ch-1 space made, ch 3 (counts as dc), dc in same space, *ch 2, [sc in next ch-1 space, ch 3] twice, sc in next ch-1 space, ch 2, shell in next ch-1 space; repeat from * 38 more times, ch 2, [sc in next ch-1 space, ch 3] twice, sc in next ch-1 space, ch 2, 2 dc in same space as beginning ch, ch 1, sc in top of beginning ch (to complete last shell), turn—40 pattern repeats.
Round 2 (WS): Ch 3, dc in same space  (formed by join), *ch 3, skip next ch-2 space, [sc in next ch-3 space, ch 3] twice, skip next ch-2 space, shell in ch-2 space of next shell; repeat from * 38 times, ch 3, skip next ch-2 space, [sc in next ch-3 space, ch 3] twice, skip next ch-2 space, 2 dc in same space as beginning ch, ch 1, sc in top of beginning ch, turn.
Round 3: Ch 3 (counts as dc), dc in same space (formed by join), *ch 1, skip next ch-3 space, fan in next ch-3 space, ch 1, shell in ch-2 space of next shell; repeat from * 38 times, ch 1, skip next ch-3 space, fan in next ch-3 space, ch 1, 2 dc in same space as beginning ch, ch 1, sc in top of beginning ch, turn.
Round 4: Ch 3, dc in same space (formed by join), *ch 1, skip next ch-1 space, sc in next ch-1 space, [ch 3, sc in next ch-1 space] 3 times, ch 1, skip next ch-1 space, shell in ch-2 space of next shell; repeat from * 38 times, ch 1, skip next ch-1 space, sc in next ch-1 space, [ch 3, sc in next ch-1 space] 3 times, ch 1, skip next ch-1 space, 2 dc in same space as beginning ch, ch 1, sc in top of beginning ch, turn.
Round 5: Ch 3, dc in same space (formed by join), *ch 2, skip next ch-1 space, sc in next ch-3 space, [ch 3, sc in next ch-3 space] twice, ch 2, skip next ch-1 space, shell in ch-2 space of next shell; repeat from * 38 more times, ch 2, skip next ch-1 space, sc in next ch-3 space, [ch 3, sc in next ch-3 space] twice, ch 2, skip next ch-1 space, 2 dc in same space as beginning ch, ch 1, sc in top of beginning ch, turn.
Round 6: Ch 3, dc in same space (formed by join), *ch 3, skip next ch-2 space, [sc in next ch-3 space, ch 3] twice, skip next ch-2 space, shell in ch-2 space of next shell; repeat from * 38 more times, ch 3, skip next ch-2 space, [sc in next ch-3 space, ch 3] twice, skip next ch-2 space, 2 dc in same space as beginning ch, ch 2, slip st in top of beginning ch (to complete last shell), turn. Fasten off A.
Round 7 (RS): Join B with slip st in ch-space of last shell made, ch 1, sc in same space, *ch 3, skip next ch-3 space, (Cl, ch 3, Cl, picot, ch 3, Cl) in next ch-3 space, ch 3, skip next ch-3 space, (sc, ch 3, sc) in next ch-2 space of next shell; repeat from * 38 more times, ch 3, skip next ch-3 space, (Cl, ch 3, Cl, picot, ch 3, Cl) in next ch-3 space, ch 3, skip next ch-3 space, sc in same space as beginning, ch 3, slip st in first sc. Fasten off.
FINISHING
Using yarn needle, weave in all ends. Block cloth.


Friday, 12 August 2011

Friday, 24 June 2011

The Art of Yarn

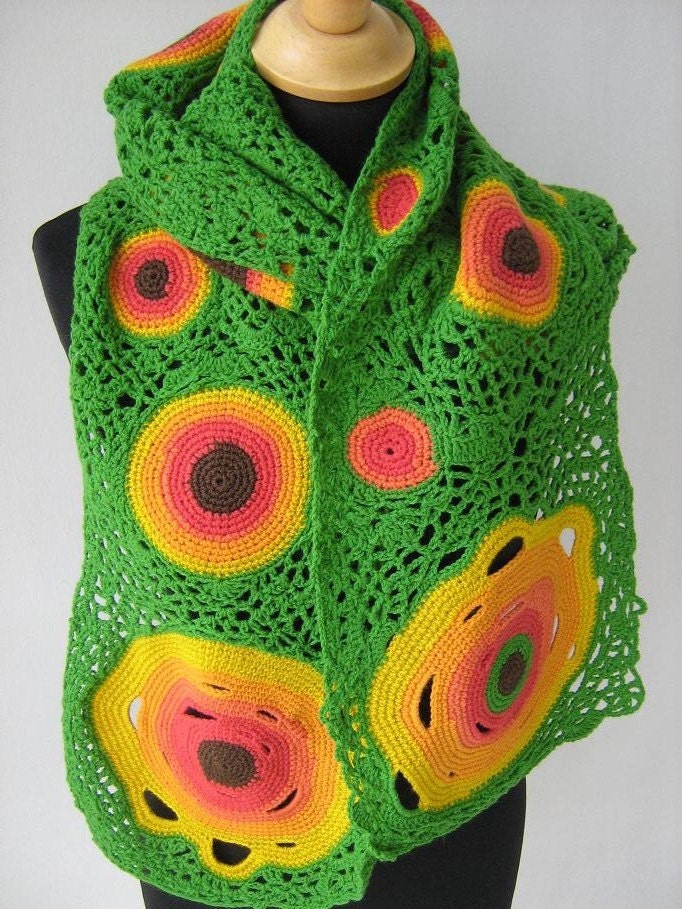
It’s the end of the week and it seems to have flown past, well it did for me. This was probably due to getiing so engrossed in finishing my Tutti Frutti Daisy blanket. Anyway I aften like to put together a treasury of Friday and this weekend’s treasury is ‘The Art of Yarn. The collection is almost entirely crochet – just as it should be. I also think putting together a treasury on Etsy is a good way to support fellow Etsy-er’s, crocheter’s and yarn-o-hollics.
I’m including a couple of the beautiful items below,, please click under the photo to go directly to that shop or

Click here to see the entire treasury of The Art of Yarn.

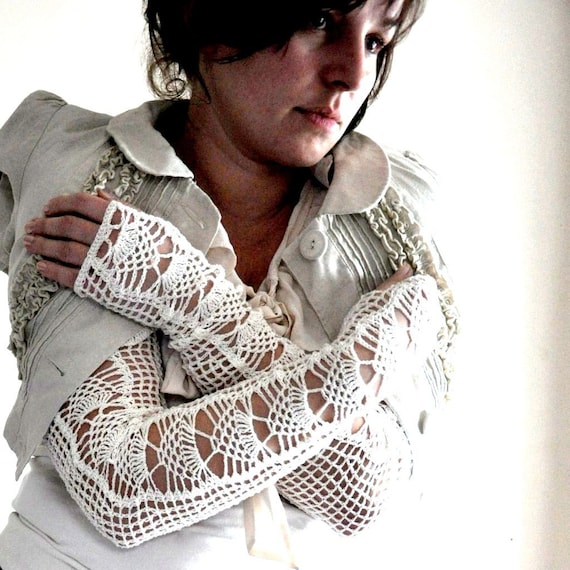
Long Lacy Opera Gloves - MADE TO ORDER
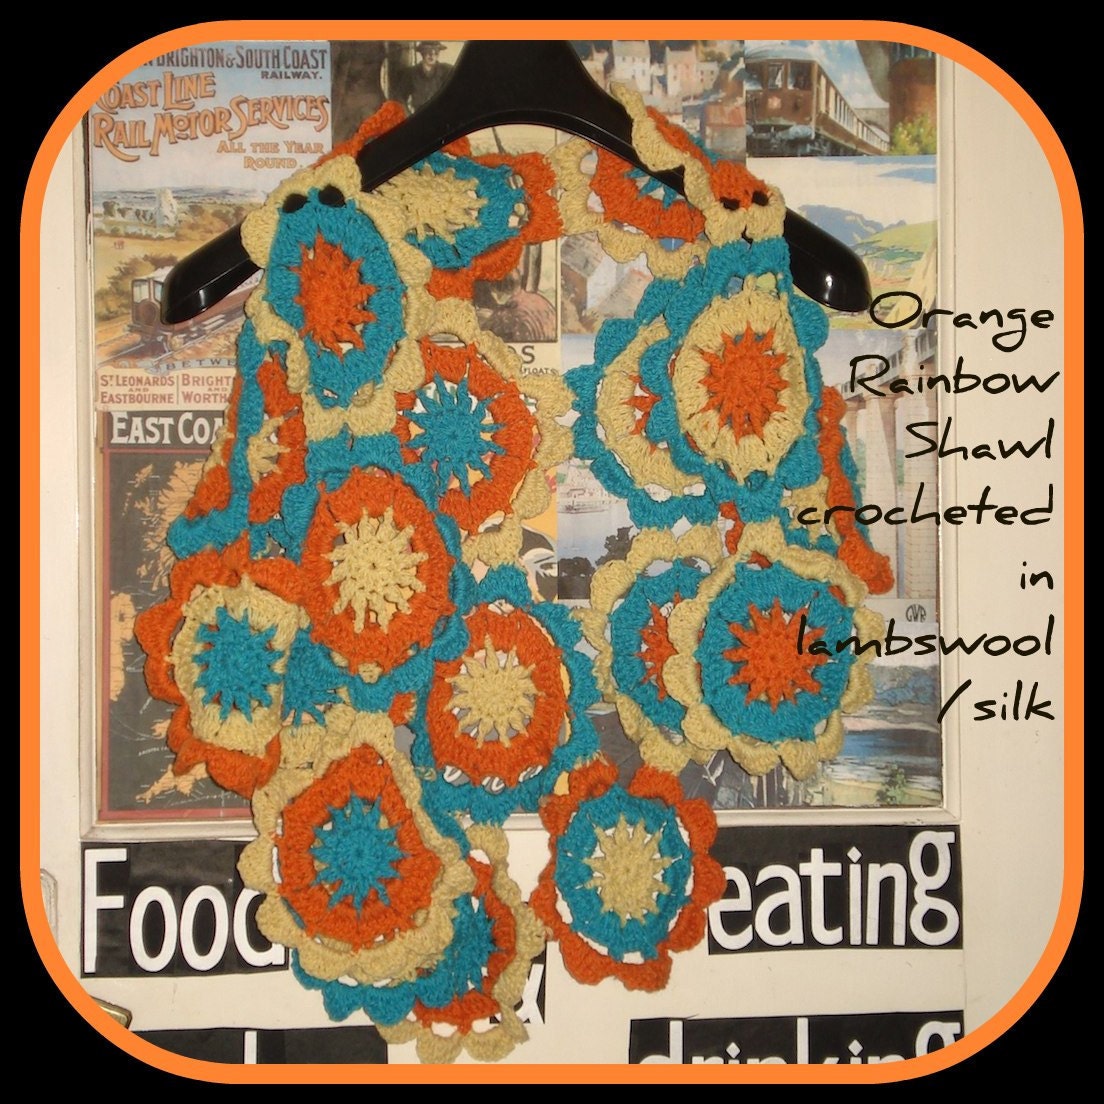
Orange Rainbow Shawl FREE SHIPPING

Before I go if any of you have Etsy shops then please leave a comment giving the name of your shop and I will be sure to add it to my favourites and feature some of your items in future treasury's.

As ever have a great weekend.

Monday, 26 April 2010

New Items on Etsy & Folksy by TheSunroomUK

189-8907_IMG
Mermaid Shawl
189-8906_IMG
Butterfly Wrap/sarong
188-8839_IMG
Patriotic Baby blanket/afghan.
188-8847_IMG
English Rose – Freeform style Christening Baby Shawl, Blanket, Afghan.
Please click here to visit my Folksy store
or click here to visit my Etsy store.

Wednesday, 21 April 2010

Easy Capelet

188-8834_IMG
Materials: 5.5mm crochet hook, 100g Patons Vintage yarn.
Pattern:
Ch 60 + 2 (to count as first dc)
Row 1: dc into each ch to end (60sts)
Row 2: ch 2, inc into first st by working 2 dc and every 5th st to end (73sts)
Row 3: ch 2, dc into each to to end
Row 4:ch 2, inc into first st by working 2 dc and every 10th st to end (81sts)
Row 5: ch 2, dc into each st to end
Row 6: ch 2, dc into each st to end
Row 7: ch 2, inc into first st by working 2 dc and every 10th st to end (89sts)
Row 8: ch 2, dc into each st to end
Row 9: ch 2, dc into each st to end
Row 10: ch 2, inc into first st by working 2 dc and every 10th st to end (99sts)
Row 11: ch 2, dc into each st to end
Row 12: ch 2, dc into each st to end
Row 13: ch 2, inc into first st by working 2 dc and every 10th st to end (110sts)
Row 14: ch 2, dc into each st to end
Row 15: ch 2, dc into each st to end
Row 16: ch 2, inc into first st by working 2 dc and every 7th st to end (126sts)
Row 17: ch 2, dc into each st to end
Row 18: ch 2, dc into each st to end
Row 19: ch 2, inc into first st by working 2 dc and every 5th st to end (152sts)
Row 20: ch 2, dc into each st to end
Finishing:
To finish darn in all end and add either a button and chained loop to fasten button alternatively crochet chains could be attached at each side of the cape to have a tie fastening.
This pattern is offered and made available for personal use only. If you wish to reproduce this in any way please contact me or make sure that reference is made to the original author’s blog http://www.goodtimesithinkso.blogspot.com/ Thank you Crochet Conversion Chart US/UK International Yarn Weight Conversion Chart
I hope you enjoy using this pattern and if you are looking for other free patterns please visit Crochet Pattern Central

Wednesday, 10 February 2010

Pumpkin Trellis Shoulder Wrap

 
186-8635_IMG
This shawl is worked in a basic trellis pattern. Shaping is created through beginning each row with 7ch and then 1 dc into 4th ch.
Materials:
50g pumpkin DK yarn, 6.5mm hook


Pattern:
Ch 100 + 7 (counts as first trellis)
Row 1: dc into 8th chain from hook, *ch 7, sk 4 ch, dc into next ch*, ** rep to end.
Rows 2 - 13: *ch 7, dc into 4th ch from previous row*, **rep to end.
Note: Rows 2-13 are worked identically.
To Finish: darn all ends in.
Edging: this wrap doesn’t require an edging and you could apply any that you wish but here I worked as follows.
Row 1: *work 1 dc into 1st ch, sl st next ch*, ** rep to end.

This pattern is offered and made available for personal use only. If you wish to reproduce this in any way please contact me or make sure that reference is made to the original author’s blog http://www.goodtimesithinkso.blogspot.com/ Thank you Crochet Conversion Chart US/UK International Yarn Weight Conversion Chart
I hope you enjoy using this pattern and if you are looking for other free patterns please visit Crochet Pattern Central

Wednesday, 13 January 2010

The History of Shawls – Wednesday Night Project 130110

 [1717144_IMG6.jpg]
The word shawl, derives its origin from the Persian 'shal', which is of ancient origin not only in India but in the Middle East as well. Shawls give warmth and have been used as a protective garment against severe cold since ancient times.
171-7162_IMG Another Comfort Payer shawl please click here for other handmade shawls etc.
The exact origin of shawl is not known. However, people were using shawls since a very long period of time. The Jewish men wore a shawl named "tallit" during prayers and ceremonies since long. In the first decade of the nineteenth century, silk shawls with fringes were available in China. These shawls with more embroidery were also popular in Europe and America during 1820s and were known as China crepe shawls. In Spain, the shawls were termed as "mantons de Manila" because they were brought to Spain from China via the Manila port. Infact, in Spain, shawls were a part of gypsy dress, known as "gitanas".
Shawls were also part of folk dress in various places like Germany, the Near East, Latin America, Andalusia and Madrid during the same period. Indian shawls became very popular as high-fashion garments in Western Europe in the early- to mid-nineteenth century.
181-8180_IMG
Persian shawls were also world famous for their intricate designs and patterns. In fact, the word "shawl" itself is of Persian origin. Persian shawls were mostly manufactured from highly esteemed wool from Kirman goats. Apart from wool, silk and cotton were also used for weaving shawls of exquisite designs in Persia. Shawls were produced mainly in Kirman and in Mashhad in northeastern Persia. Besides, Tabriz town was also known for producing shawls of various types. Persian shawls competed in the market with shawls woven on jacquard looms in Russia and Europe.
Russian shawl history is a blend of oriental and European culture. It is said that Russian trade with Persia centuries ago resulted in the popularity of Persian shawls among Russian women. This in turn, initiated the process of shawl weaving in Russia. But eventually, the ornamental Russian shawl industry came up with innovative designs and finishes and became popular worldwide. Nepal is also known for producing Pashmina shawls of good quality since long.
174-7493_IMG
Shawls were popular amongst Indians in variety of forms since ancient times. The history of shawl weaving is closely linked to the history of woolen textiles in India. Kashmir valley of India is known for weaving shawls from Pashmina wool. Among all other shawls produced in India, Kashmiri shawls are known for their softness, warmth and traditional designs. The intricately embroidered and hand woven shawls from Kashmir are popular throughout Europe, Persia and other western countries since years.
166-6632_IMG

Pashmina is considered as the softest, most luxurious and best wool in the world. The warmest and most luxurious of all the animal fibers, the wool basically comes from the cashmere hair of a Central Asian Species of the mountain goat, Capra hircus, also known as shawl goat. The fiber was also obtained from goats in Tibet and Central Asia. Even in modern India, shawls are a part of traditional male costumes in the colder regions of the Himalayas.
The Indian shawl industry got international recognition during the British rule in India. Apart from Kashmir, shawl making also spread its wings to Punjab, West Bengal, Gujarat and some other north eastern states in India.
Here is another link to a lovely vintage shawl pattern and a fabulous blog.

Friday, 13 November 2009

Cuddle Me - Elegant Shoulder Warmer


Shoulder Warmer
7mm hook
Caledon Hills Worsted Wool – Sweet Pea 200g
Darning/tapestry needle.
Note: This pattern is written in US if you are working in the UK please refer to my Crochet Conversion Chart US/UK
Ch 70 join with slip stitch to form neckline.
Rnd 1 – ch 2, dc all the way around and join with sl st
Rnd 2 – ch 2, increase by working x2 dc into each 5th st, all other stitches 1 dc, join with sl st
Rnd 3 – ch 2, increase by working x2 dc into each 4th st, all other stitches 1 dc, join with sl st
Rnd 4 – 16 ( repeat row 4 12 times) –ch 2, dc into 1st st and every st all around.
Finishing.


Scallop Edge
1 sc into first st, *skip next st, x5 dc into next st, skip next st, 1 sc into next st*, ** repeat all around.
Sew all ends in.
Although I have edged this with a scallop edging you could use various other types of edging or attach tassels or fringing.
178-7831_IMG

Monday, 28 September 2009

Autumn Comfort Prayer Shawl Knitted - Easy


I designed this pattern to be quick, easy and cosy. It only took a couple of hours to knit up and only uses knit & purl stitches so no expertise is required. To keep the autumnal feel pick a yarn in autumn shades. Don’t forget if you want to convert any yarn go to Yarndex  
The shawl is reversible so can be worn either way. I designed the shaping so that it fits snugly around the shoulders without being a long triangle.
Autumn Comfort Prayer Shawl Easy
Yarn – Mohair and acrylic blend. I used Paton’s Spirit, 200gms or approx 360m – shade ‘Bracken
Needles: 10mm circular needles used for length only. Tapestry needle for sewing ends in.
c/o 80 sts. Increase Section
Row 1, Knit
Row 2, Purl
Row 3, Knit
Row 4 - Purl
Row 5 - Knit, increase 1 st after every 4th st  (99sts)
Row 6 - Purl
Row7 - Knit
Row 8 - Purl
Row 9 - Knit, increase 1 st after every 5th st (119sts)
Rows 10 - Purl
Row,11 - Knit
Row 12 - Purl
Row 13 - Knit, increase 1 st after every 6th st ( 138)
Row 14 - Purl
Row 15 - Knit
Row 16  - Purl
Row 17 - Knit, increase 1 st after every 7th st  (159sts)
Row 18, Purl
Decrease Section
Row 19 - Knit, decrease 1 st each end
Continue working all rows knit then purl alternatively.
Decrease 1 st each end of every knit row until 100sts remain.
Now decrease 1 st each end of every row (knit & Purl) until 1 st remains then cast off.


For further knitting instruction, guidance and patterns please visit Knitting Pattern Central

Friday, 3 July 2009

Scarves, Shawls and Sunny Days

This week has been incredibly hot and sticky but not as sunny as the rest of the country. The heat has been unbearable at night making a good nights sleep somewhat elusive. The children finished school this week so hopefully we’re in for sunny days during the summer holidays.

I’ve been working on various items this week – the ongoing retro octagon blanket a spiral scarf and a quick crochet shawl.

166-6616_IMG

The beginnings of the scarf – knitted on a circular needle 6mm, purely for length 6mm. This was quite tricky for the first couple of rows – sat in the sunny with sweaty hands and using a yarn with no stretch properties.

The finished scarf – very quick and

166-6622_IMGeasy to make.

166-6624_IMG

I decided that I really needed to start working in some new colours. I seem to be stuck in blues, greens and purples at the moment. I searched my stash and came up with some Wendy Fusion – Cajun. This yarn is 50% wool and 50% acrylic, it’s quite soft and snuggly and so I crocheted a shawl with it. I used a 6mm hook and it worked up very quickly.

166-6632_IMG

A close up of the openwork chain pattern.

166-6630_IMG

Measures approx. 130cm wide 90cm length.

166-6627_IMG

So we’ve been out in the garden doing some trimming, pruning and sitting in the sun. A few pictures of plants in bloom below.

166-6617_IMG

How vibrant is that colour ?

166-6621_IMG

This was a huge tree that we had to cut down a couple of years ago. I planted it up with a fern which has successfully made it’s home there. It looks like a strange dwarf palm tree but it keeps me happy.

166-6619_IMG

Pinks in full bloom.

Well the rain has arrived and things are cooling down just in time for the summer holidays. I will continue to work away at my octagon’s and hopefully gain some new inspiration for items to make in the coming days.

I have just got a new 10mm crochet hook and may have a go at attempting a crochet rag rug.