googleads

Sunday, 30 June 2013

Guadalupe Wrap–Free Crochet Pattern


FINISHED MEASUREMENTS:
Wrap measures 54"/137 cm diameter
GAUGE
In mesh pattern, 10 sts = 4"/10 cm and 5 rows = 3"/7.5 cm.
In cluster pattern, 5 cluster repeats = 4"/10 cm and 6 rows = 3 1/2"/9 cm.
STITCHES USED
Chain (ch), double crochet (dc), half double crochet (hdc), single crochet (sc), slip stitch (slip st), treble crochet (tr)
SPECIAL TERMS
edc: extended double crochet:Yarn over, insert hook in indicated stitch or space, yarn over and draw up a loop, yarn over and draw through one loop on hook, [yarn over and draw through 2 loops on hook] twice.
V-st: 2 edc in space between stitches.
V-st in V-st: 2 edc in space between 2 edc of indicated V-st.
Cl: 3-double crochet cluster: Yarn over, insert hook in indicated space, yarn over and draw up a loop (three loops on hook), yarn over and draw through 2 loops on hook (2 loops on hook), [yarn over, insert hook in same space, yarn over and draw up a loop, yarn over and draw through 2 loops on hook] twice, yarn over and draw through all 4 loops on hook.
beg-Cl:2-double crochet cluster: Yarn over, insert hook in indicated space and draw up a loop, yarn over and draw through 2 loops on hook; yarn over, insert hook in same space, yarn over and draw up a loop, yarn over and draw through 2 loops on hook yarn over and draw through all 3 loops on hook.
shell: (2 dc, ch 2, 2 dc) in indicated space.
fan: tr in indicated stitch or space, (ch 1, tr) in same stitch or space.
picot: Ch 3, slip st from top to bottom through all front strands of last stitch made.
NOTES
1. Draped as a cover over an occasional table or as a throw over the back of a chair or worn as a shawl, this round is a lovely, lacy accent piece.  Crocheted in worsted weight NaturallyCaron.com Country, the fabric is soft, resilient and easy-care.  The center of the round is made in a quick crochet mesh, ringed with a striped cluster pattern for color and texture, finished with a “strawberry” lace pattern for a slightly ruffled edge. Change the order of the colors for a different look, or swap out one, two or all three colors as you desire.
2. Fabric is stretchy and will grow in length and block to measurements
3. To change color at end of a round. Fasten off old color. Join new color with slip st in same stitch as join.
4. Cover has three sections: 1) solid color mesh section, worked in joined rounds with RS always facing, 2) three-color cluster section, and 3) lace edging.

SHAWL
Mesh Section
Note: This section is worked in a mesh stitch pattern, placing edc in the space between edc, and increasing 9 stitches each round. If you have difficulty seeing where the increase V-sts are, then mark the increase points and move the markers up as work progresses. Do not turn at end of rounds, RS is always facing.
With A, chain 4; join with slip st in first ch to form a ring.
Round 1 (RS): Ch 1, 9 sc in ring; join with slip st in first sc—9 sc.
Round 2: Ch 3 (counts as one leg of last V-st), V-st in next 8 sc, edc in same sc as beginning; slip st in top of beginning ch (to complete last V-st)—9 V-sts (18 sts).
Mark increase points: Place a marker in the space between legs of each V-st. Move markers up as work progresses.
Round 3: Ch 3, edc in space between V-sts, [V-st in next V-st and move marker up, edc in space between V-sts] 8 times, edc in same space as beginning ch; slip st in top of beginning ch (to complete last V-st)—27 sts.
Round 4: Ch 3, edc in each space between sts to first (marked) V-st, [V-st in next V-st and move marker up, edc in each space between sts to next (marked) V-st] 8 times, edc in same space as beginning ch; slip st in top of beginning ch (to complete last V-st)—36 sts.
Rounds 4–24: Repeat Round 4 twenty more times—216 sts.
Fasten off.
Note: For a larger or smaller cloth, add or omit repeats of Round 4 before starting the cluster section. For the best "math" when setting up the next section, end with an even number of rounds and stitches.
Cluster Section
Notes: This section consists of alternating rows of V-sts (wrong side) and clusters (right side), worked in the following color sequence: 1 row of B, 1 row of C, 1 row of A. Fasten off and change color at the end of each round. Continue to increase at each of the 9 increase points around, moving the markers up to the center st or ch-1 space as work progresses.
Turn work so WS is facing you, join B with slip st in space between legs of last V-st made.
Round 1 (WS): With B, ch 3 (counts as hdc, ch 1), hdc in same space, *[skip next 2 edc, (hdc, ch 1, hdc) in next space between edc sts] 11 times, skip next 2 edc, (hdc, ch 1, hdc, ch 1, hdc) in next (marked) V-st and move marker into center hdc of increase; repeat from * 7 more times; [skip next 2 edc, (hdc, ch 1, hdc) in next space between edc sts] 11 times, skip next 2 edc, hdc in same space as beginning ch, ch 1; join with slip st in 2nd ch of beginning ch (to complete beginning increase), turn—117 ch-1 spaces. Fasten off.
Round 2 (RS): Join next color with slip st in last ch-1 space made, ch 2, beg-Cl in same space, *ch 1, Cl in next ch-1 space; repeat from * around moving increase markers into ch-1 space between clusters, end with ch 1, slip st in top of beg-Cl, turn—117 clusters. Fasten off.
Round 3: Join next color with slip st in first ch-1 space of previous round, ch 3 (counts as hdc, ch 1), hdc in same ch-1 space, *(hdc, ch 1, hdc) in each ch-1 space across to next marked ch-1 space, (hdc, ch 1, hdc, ch 1, hdc) in marked ch-1 space and move marker into center hdc of increase; repeat from * 7 more times, (hdc, ch 1, hdc) in each ch-1 space around; hdc in same space as beginning ch, ch 1; join with slip st in 2nd ch of beginning ch (to complete beginning increase), turn—126 ch-1 spaces. Fasten off.
Rounds 4–10: Continuing in color sequence, repeat Rounds 2 and 3 three more times, then work Round 2 once more (worked with B). At end of last round—153 clusters.
Note: To prepare for the Lace section, the next round needs to end with 160 ch-1 spaces (a multiple of 4). Therefore, it is necessary to omit two of the increases, adding only 7 ch-1 spaces instead of 9. Remove 2 of the increase point markers; select markers that are widely spaced around circle.
Round 11: Repeat Round 3 increasing only at remaining 7 marked increase points—160 ch-1 spaces. Fasten off.
Lace Section
Round 1 (RS): Join A with slip st in last ch-1 space made, ch 3 (counts as dc), dc in same space, *ch 2, [sc in next ch-1 space, ch 3] twice, sc in next ch-1 space, ch 2, shell in next ch-1 space; repeat from * 38 more times, ch 2, [sc in next ch-1 space, ch 3] twice, sc in next ch-1 space, ch 2, 2 dc in same space as beginning ch, ch 1, sc in top of beginning ch (to complete last shell), turn—40 pattern repeats.
Round 2 (WS): Ch 3, dc in same space  (formed by join), *ch 3, skip next ch-2 space, [sc in next ch-3 space, ch 3] twice, skip next ch-2 space, shell in ch-2 space of next shell; repeat from * 38 times, ch 3, skip next ch-2 space, [sc in next ch-3 space, ch 3] twice, skip next ch-2 space, 2 dc in same space as beginning ch, ch 1, sc in top of beginning ch, turn.
Round 3: Ch 3 (counts as dc), dc in same space (formed by join), *ch 1, skip next ch-3 space, fan in next ch-3 space, ch 1, shell in ch-2 space of next shell; repeat from * 38 times, ch 1, skip next ch-3 space, fan in next ch-3 space, ch 1, 2 dc in same space as beginning ch, ch 1, sc in top of beginning ch, turn.
Round 4: Ch 3, dc in same space (formed by join), *ch 1, skip next ch-1 space, sc in next ch-1 space, [ch 3, sc in next ch-1 space] 3 times, ch 1, skip next ch-1 space, shell in ch-2 space of next shell; repeat from * 38 times, ch 1, skip next ch-1 space, sc in next ch-1 space, [ch 3, sc in next ch-1 space] 3 times, ch 1, skip next ch-1 space, 2 dc in same space as beginning ch, ch 1, sc in top of beginning ch, turn.
Round 5: Ch 3, dc in same space (formed by join), *ch 2, skip next ch-1 space, sc in next ch-3 space, [ch 3, sc in next ch-3 space] twice, ch 2, skip next ch-1 space, shell in ch-2 space of next shell; repeat from * 38 more times, ch 2, skip next ch-1 space, sc in next ch-3 space, [ch 3, sc in next ch-3 space] twice, ch 2, skip next ch-1 space, 2 dc in same space as beginning ch, ch 1, sc in top of beginning ch, turn.
Round 6: Ch 3, dc in same space (formed by join), *ch 3, skip next ch-2 space, [sc in next ch-3 space, ch 3] twice, skip next ch-2 space, shell in ch-2 space of next shell; repeat from * 38 more times, ch 3, skip next ch-2 space, [sc in next ch-3 space, ch 3] twice, skip next ch-2 space, 2 dc in same space as beginning ch, ch 2, slip st in top of beginning ch (to complete last shell), turn. Fasten off A.
Round 7 (RS): Join B with slip st in ch-space of last shell made, ch 1, sc in same space, *ch 3, skip next ch-3 space, (Cl, ch 3, Cl, picot, ch 3, Cl) in next ch-3 space, ch 3, skip next ch-3 space, (sc, ch 3, sc) in next ch-2 space of next shell; repeat from * 38 more times, ch 3, skip next ch-3 space, (Cl, ch 3, Cl, picot, ch 3, Cl) in next ch-3 space, ch 3, skip next ch-3 space, sc in same space as beginning, ch 3, slip st in first sc. Fasten off.
FINISHING
Using yarn needle, weave in all ends. Block cloth.








Saturday, 29 June 2013

Colonial Charm Afghan–Free Vintage Crochet Pattern

colonialcharm

Source - Freevintagecrochet.com

Afghan measures approximately 44 x 64 inches

MATERIALS:

CHADWICK'S RED HEART SOCK AND SWEATER YARN, 3 Ply, Shrink-and-Stretch Resist Finish, Art. E.255: 9 skeins (1 oz. "Tangle-Proof" Pull-Out Skeins) of No. 12 Black; 7 skeins of No. 686 Paddy Green; 5 skeins of No. 230 Yellow and 7 skeins of assorted colors.

Clark's O.N.T. Plastic Crochet Hook No. 4.

GAUGE: Each motif measures 4 inches from point to point.

FIRST MOTIF . . . Starting at center with Black, ch 5. Join with sl st to form ring. 1st rnd: 12 sc in ring. Join and break off. 2nd rnd: Attach Yellow to first sc, ch 3, dc in same sc, 2 dc in each sc around. Join and break off. 3rd rnd: Attach Black to same place as sl st, sc in same place, sc in back loop of each dc around. Join and break off. 4th rnd: Attach any color of assorted colors to first sc, sc in same place, * sl st in next sc, ch 3, (yarn over, insert hook in same sc, draw loop through) 3 times; yarn over and draw through all loops on hook (puff st made), ch 3, sl st in same sc, sc in next sc. Repeat from * around. Join and break off. 5th rnd: Attach Black to ch-3 preceding any puff st, sc in same place, * ch 3, sc in next ch 3, ch 1, dc in next sc, ch 1, sc in next ch 3. Repeat from * around. Join and break off. 6th rnd: Attach Paddy Green to any dc, sc in same place, * ch 3, sc in next ch-3 loop, ch 3, in next dc make dc, ch 3 and dc; ch 3, sc in next ch-3 loop, ch 3, sc in next dc. Repeat from * around. Join and break off.

SECOND MOTIF . . . Work as for First Motif until 5 rnds have been completed. 6th rnd: Attach Paddy Green to any dc, sc in same place, ch 3, sc in next ch-3 loop, ch 3, dc in next dc, ch 1, sl st in corresponding loop on First Motif, ch 1, dc in same dc on Second Motif, ch 3, sc in next ch-3 loop, ch 1, sl st in corresponding loop on First Motif, ch 1, sc in next dc on Second Motif, ch 1, sl st in next loop on First Motif, ch 1, sc in next ch-3 loop on Second Motif, ch 3, dc in next dc and join next corner loop as before. Complete rnd (no more joinings).

Make 13 rows of 16 Motifs, joining adjacent sides as shown on chart as Second Motif was joined to First Motif (where 3 corners meet, join 3rd corner to joining of previous 2 corners).

EDGING . . . 1st rnd: Attach Paddy Green to corner sp of any side motif, ch 3, in same sp make dc, ch 3 and 2 dc; * 3 dc in each of next 4 sps, holding back on hook the last loop of each dc make a dc in next 2 joined loops, thread over and draw through all loops on hook (joint-dc made), 3 dc in each of next 4 sps, in next sp make 2 dc, ch 2 and 2 dc. Repeat from * around, making joint-dc over each joining and 2 dc, ch 3 and 2 dc in each corner loop. Join and break off. 2nd rnd: Attach Yellow to same place as sl st, sc in back loop of next dc, sc in next 3 ch, * sc in back loop of each dc to within 1 dc of next joint-dc, holding back on hook the last loop of each sc make sc in next dc, skip next joint-dc, sc in next dc, thread over and draw through all loops on hook (1 sc decreased). Repeat from * around, decreasing 1 sc over each joint-dc and making sc in each ch of ch-3. Join and break off. 3rd rnd: Attach Black to same place as sl st, sc in same place, sc in back loop of next 2 sc, 3 sc in back loop of next sc, sc in back loop of each sc around, decreasing 1 sc over previous decreases as before and making 3 sc in center sc of each point. Join and break off. 4th rnd: Attach Yellow and repeat last rnd. 5th rnd: Attach Green to same place as sl st, ch 3, dc in back loop of each sc around, making 3 dc in center sc of each point and decreasing 1 dc over previous decreases as before. Join and break off. Block to measurements.

afghans289_c118chart

Thursday, 27 June 2013

Crochet & Knitting Offer Long-term Health Benefits

rainbow2

New studies show that knitting, crochet and other repetitive needlework provide a number of invaluable health benefits. Since 2005, ex-senior physiotherapist Betsan Corkhill collected anectodal evidence and launched a collaborative study with scientists at many different universities on the role of knitting in health. They found that such rhythmic repetitive acts help prevent and manage stress, pain and depression, which in turn strengthens the body’s immune system.


Stress exacerbates most medical conditions and is known to be a contributing factor in heart disease, depression and other chronic illness. In our increasingly stressful lives, doctors are advising people to manage stress as part of overall health. Knitting, crochet and other needlework have been found to be an effective way for people to manage stress and depression, and have been especially useful for those in long-term pain management. Pain specialist Monica Baird explains that the action of knitting actually changes brain chemistry, decreasing stress hormones and increasing feel-good serotonin and dopamine.

Many argue that the repetitive movements of knitting activate the same areas in the brain as meditation and yoga, which have been shown to help prevent pain and depression. Dr. Herbert Bendon, Director of the Institute for Mind, Body Medicine at Massachusetts General Hospital and Associate Professor of Medicine at Harvard Medical School notes that knitting is one method to create a “relaxation response” in the body, which can lower blood pressure, heart rate and help prevent illness. Knitting and crochet have a calming effect overall which can help manage anxiety and may even help conditions such an asthma or panic attacks. Additionally, the repetitive movements have been shown to help manage disruptive behavior and ADHD in children.
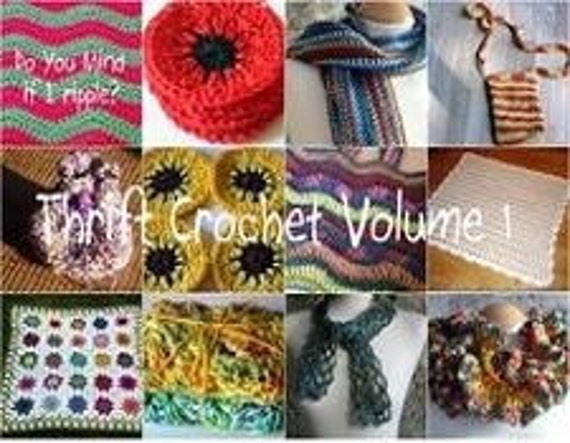
Thrift Crochet Volume 1 Crochet Pattern PDF Collection

Wednesday, 26 June 2013

Crochet Conscupiscience - 4 Ways Crochet Helped Me Through Depression.

Post image for 4 Ways Crochet Helped Me Through Depression

Visit Crochet Concupiscience by clicking here.

In an interview awhile back with Sylvia Browder I was able to answer the question about how crochet helped me through depression in a short form that I hope people will understand even if they don’t crochet.

Here’s what I said:

“I experienced many benefits from the craft including:

  • The repetition of it releases serotonin, which is a natural anti-depressant.
  • The craft is calming so it reduces the anxiety associated with depression. My anxiety was terrible so this was really helpful for me.
  • Creating beautiful things by hand and developing new skill helps build self-esteem, something frequently lost in depression.
  • Crafting for others helps you feel productive even if depression makes it hard to get out of bed some days. I hate feeling unproductive so it was wonderful for me to feel like I was doing something again!

Many of the benefits of the craft can be found through other crafts, too, including writing!”

You can learn more about the book if you read my whole interview with awesome businesswoman Sylvia Browder or get the full story about how Crochet Saved My Life by purchasing the book 4 Ways Crochet Helped Me Through Depression.

Tuesday, 25 June 2013

Klimt Colourful Jazzy Crochet Blanket

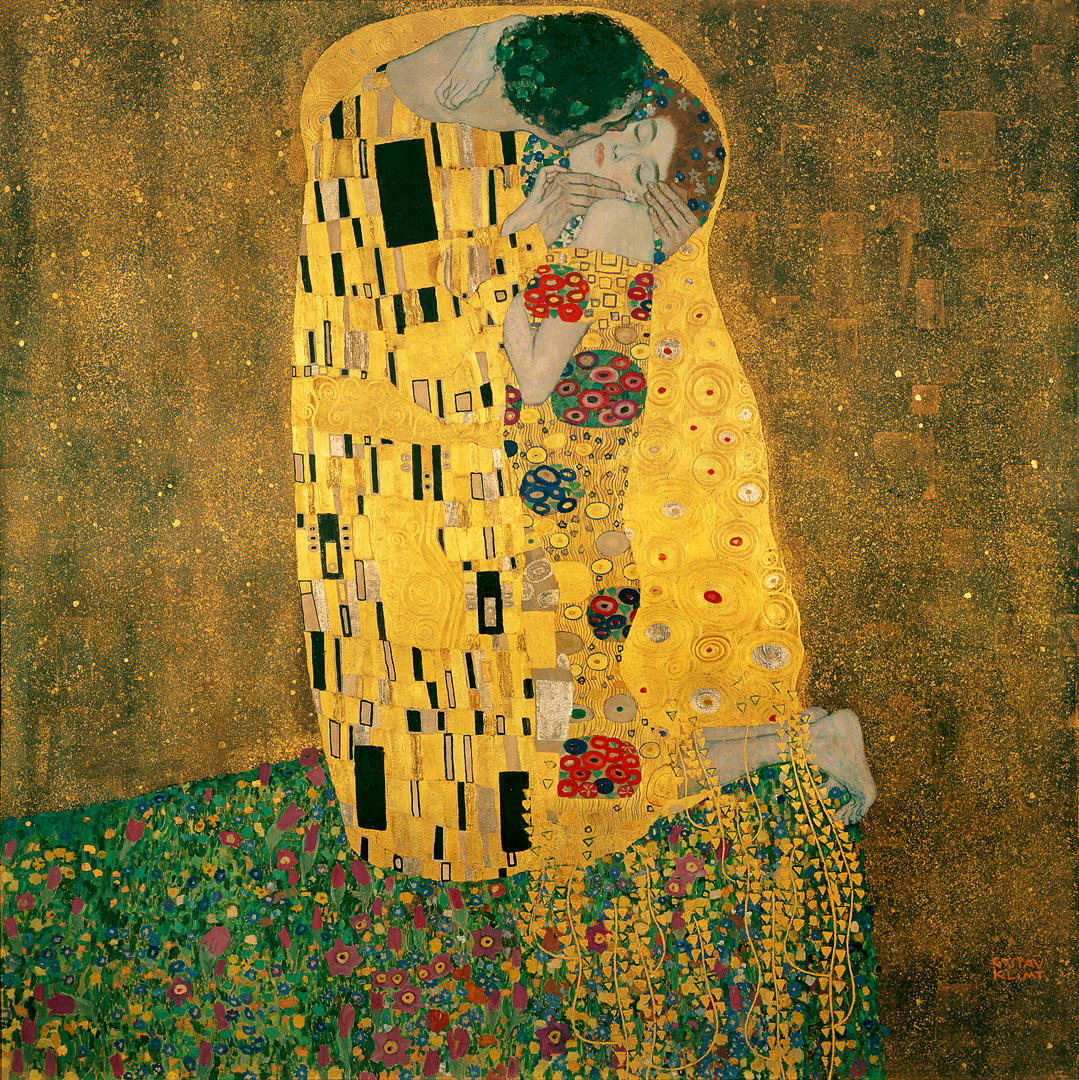
Here is my most recent creation and it reminds me of Gustav Klimt’s The Kiss. The blanket is much brighter and vivid than the photographs reflect, but I love it.

My Etsy Store

IMG_1744

IMG_1744

IMG_1732

IMG_1741

Sunday, 23 June 2013

Crochet on The Street.


New yarnbombing pictures crochet steps

There was breaking news on the guerilla knitting front this morning as the secret yarnbombinggroup from England arrived in New York for VogueKnitting Live. The identity of the Cornwall urban knitting group has been revealed through Twitter research as Britain's mysterious "graffitigrannys," masters of street art by night, invited to cross the pond for knitting's premier East Coast event hosted this weekend by Vogue Knitting Magazine, Jan 14 - 16 at the Hilton NY Hotel.

Yarnbombing pictures urban knitting from around the globe posted on Twitter and Facebook by graffiti grannys

Graffiti Grannys Facebook

Yarnbombing pictures urban knitting from around the globe posted on Twitter and Facebook by graffiti grannys

Donna Rutledge-Okoro

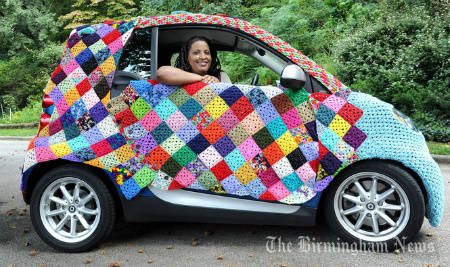
Donna Rutledge-Okoro has been blogging about her crochet work since 2004. She opened an Etsy store in 2008 where she sells her crochet patterns and finished items, most of which are accessories and several of which have cool innovative style with an urban edge. Okoro began yarnbombing in 2010. Some of her yarnbombed chairs were placed on display in 2011 at the Jennifer Harwell Gallery and most recently she was commissioned to do some yarnbomb art for the Birmingham Museum of Art. She also teaches crochet. I love that she is immersed in so many different aspects of the business of crochet!

More details at crochetconcupiscience.com here.

Saturday, 22 June 2013

Giant crocheted doily appears under Bristol bridge


Guerrilla crochet under Stapleton railway bridge in Bristol

A giant crocheted doily has appeared under a railway bridge in Bristol.

The 12ft (3.6m) diameter "spider web" was seen hanging under Stapleton Road railway bridge by Gail Boyle as she drove into work earlier.

"It's a massive piece of crochet... and the nylon cord must be up to an inch thick," she said.

"I've no idea who is responsible, it might be 'yarn bombing', but I crochet and I know that they are proper crochet stitches," she added.

Yarn bombing - also known as guerrilla knitting - is a type of street art or graffiti using items made from yarn - whether knitted, crocheted, or made into pom-poms.

"Last year lots of people were doing yarn bombing and a cloak was knitted for the Queen Victoria statue on College Green," said Ms Boyle.

"But this latest piece of guerrilla crochet is beautiful - it shines like a little white beacon."

Source: bbc.co.uk

Friday, 21 June 2013

Bamboo Crochet Motifs Tunic–Crochet Pattern


Large openwork motifs in a stylish tunic for any occasion. Shown in Bernat Bamboo.

Source: Bernat.com

SIZES
To fit bust measurement

Extra-Small/Small 28-34 ins [ 71-86.5 cm ]
Medium 36-38 ins [ 91.5-96.5 cm ]
Large 40-42 ins [ 101.5-106.5 cm ]
Extra-Large 44-46 ins [ 112-117 cm ]
2/3 Extra-Large 48-54 ins [ 122-137 cm ]
4/5 Extra-Large 56-62 ins [ 142-157.5 cm ]
Finished bust
X-Small/Small 36 ins [ 91.5 cm ]
Medium 40 ins [ 101.5 cm ]
Large 45 ins [ 114.5 cm ]
X-Large 50 ins [ 127 cm ]
2/3 X-Large 54 ins [ 137 cm ]
4/5 X-Large 60 ins [ 152.5 cm ]

Materials
Bernat® Bamboo
(60 g / 2.1 oz)
Sizes XS/S M L XL 2/3XL 4/5XL
92420 (Lotus) 9 10 12 13 15 16 balls
Sizes XS/S, L and 2/3XL only: Size 5.5 mm (U.S. I or 9) crochet hook or size needed to obtain gauge.
Sizes M, XL and 4/5XL only: Size 6 mm (U.S. J or 10) crochet hook or size needed to obtain gauge.

STITCH gLOSSARy
Ch = Chain(s).
Hdc = Half double crochet.
Rep = Repeat.
Rnd(s) = Round(s).
Sc = Single crochet.
Sl st = Slip stitch.
Sp(s) = Space(s).
St(s) = Stitch(es).
Tog = Together.

gAugE
Motif = 4½ ins [11.5 cm] in diameter with 5.5 mm crochet hook.
Motif = 5 ins [12.5 cm] in diameter with 6 mm crochet hook.
instructions
The instructions are written for smallest size. If changes are necessary for larger sizes the instructions will be written thus ( ). When only one number is given, it applies to all sizes. For ease in working, circle all numbers pertaining to your size.
Note: Motifs will be joined tog as they are worked. Follow Diagrams on pages 16 and 17 for placement of corresponding sizes.

MOTIF I
Ch 6. Join with sl st to first ch to form a ring.
1st rnd: Ch 1. (1 sc in ring. Ch 4) 5 times. 1 sc in ring. Ch 1. 1 hdc in first sc.
2nd rnd: Ch 1. 1 sc in side of last hdc. (Ch 4. 1 sc in next ch-4 sp) 5 times. Ch 1. 1 hdc in first sc.
3rd rnd: Ch 1. 1 sc in side of last hdc. *(Ch 4. 1 sc) twice in next ch-4 sp. Rep from * 4 times more. Ch 4. 1 sc in last ch-1 sp. Ch 1. 1 hdc in first sc.
4th rnd: Ch 1. 1 sc in side of last hdc. (Ch 4. 1 sc in next ch-4 sp) 11 times. Ch 1. 1 hdc in first sc. Fasten off.
Join Motifs into first rnd as follows:
To Join 2 Motifs: Work 1st to 3rd rnds as given for Motif I.
4th rnd: Ch 1. 1 sc in side of last hdc. (Ch 2. Sl st in any ch-4 sp of adjoining motif. Ch 2. 1 sc in next ch-4 sp) twice. (Ch 4. 1 sc in next ch-4 sp) 9 times. Ch 1. 1 hdc in first sc. Fasten off.
To Join 3rd Motif:Work 1st to 3rd rnds as given for Motif I.
4th rnd: Ch 1. 1 sc in side of last hdc. Miss next 4 ch-4 sps of adjoining motif from previous join. (Ch 2. Sl st in next ch-4 sp of adjoining motif. Ch 2. 1 sc in next ch-4 sp) twice. (Ch 4. 1 sc in next ch-4 sp) 9 times. Ch 1. 1 hdc in first sc. Fasten off.
Join last Motif to previous and first Motifs:Work 1st to 3rd rnds as given for Motif I.
4th rnd: Ch 1. 1 sc in side of last hdc. *Miss next 4 ch-4 sps of adjoining motif from previous join. (Ch 2. Sl st in next ch-4 sp of adjoining motif. Ch 2. 1 sc in next ch-4 sp) twice. (Ch 4. 1 sc in next ch-4 sp) 5 times. Rep from * once more, ending last rep with: Ch 1. 1 hdc in first sc. Fasten off.

BODY
With smaller (larger-smaller-larger-smaller- larger) hook, make 46 (46- 54-54-90-90) Motifs, joining as you work (see Diagrams on page 16).
Join 3 Motifs:Work 1st to 3rd rnds as given for Motif I.
4th rnd: Ch 1. 1 sc in side of last hdc. Miss next 2 ch-4 sps of first adjoining motif from right join. (Ch 2. Sl st in next ch-4 sp of first adjoining motif. Ch 2. 1 sc in next ch-4 sp) twice. (Ch 2. Sl st in next ch-4 sp of second adjoining motif. Ch 2. 1 sc in next ch-4 sp) twice. (Ch 4. 1 sc in next ch-4 sp) 7 times. Ch 1. 1 hdc in first sc. Fasten off.
Join 4 Motifs:Work 1st to 3rd rnds as given for Motif I.
4th rnd: Ch 1. 1 sc in side of last hdc. Miss next 2 ch-4 sps of first adjoining motif from right join. (Ch 2. Sl st in next ch-4 sp of first adjoining motif. Ch 2. 1 sc in next ch-4 sp) twice. (Ch 2. Sl st in next ch-4 sp of second adjoining motif. Ch 2. 1 sc in next ch-4 sp) twice. (Ch 2. Sl st in next ch-4 sp of third adjoining motif. Ch 2. 1 sc in next ch-4 sp) twice. (Ch 4. 1 sc in next ch-4 sp) 5 times. Ch 1. 1 hdc in first sc. Fasten off.

SLEEVES
With smaller (larger-smaller-larger-smaller- larger) hook, make 12 (12- 15-15-21-21) motifs for each sleeve, joining as you work (see Diagrams on page 17).

FINISHING
Sew in sleeves.

Thursday, 20 June 2013

K W Cool Crochet Poncho

poncho

From Bernat.com

SIZES
To fit chest/bust measurement
Extra-Small/Medium
28-38 ins [71-96.5 cm]
Large/2 Extra-Large
40-50" [101.5-127"]
3 Extra-Large/5 Extra-Large
52-62" [132-157.5"]

GAUGE
Sizes XS/M and L/2XL:
11 hdc and 9 rows = 4 ins [10 cm] with 6 mm crochet hook.
Size 3XL/5XL:
10 hdc and 8 rows = 4 ins [10 cm] with 6.5 mm crochet hook.

Size 6 mm (U.S. J or 10) or 6.5 mm (U.S. K or 10½) crochet hook or size needed to obtain gauge.

MATERIALS
Bernat® Berella 4
Bernat® Super Value
Bernat® Satin

Photographed garment made with
Bernat Super Value
Size XS/M
MC: (Light Purple) 105 g (3.75 oz)/195 m (215 yds)
A: (Dark Purple) 120 g (4.25 oz)/216 m (236 yds)
B: (Blue) 105 g (3.75 oz)/195 m (215 yds)
C: (Green) 60 g (2.25 oz)/108 m (119 yds)
D: (White) 40 g (1.5 oz)/72 m (79 yds)
E: (Pink) 40 g (1.5 oz)/72 m (79 yds)
Size L/2XL
MC: (Light Purple) 150 g (5.25 oz)/265 m (295 yds)
A: (Dark Purple) 175 g (6 oz)/305 m (340 yds)
B: (Blue) 115 g (4 oz)/205 m (225 yds)
C: (Green) 90 g (3.25 oz)/160 m (175 yds)
D: (White) 55 g (2 oz)/100 m (110 yds)
E: (Pink) 55 g (2 oz)/100 m (110 yds)
Size 3XL/5XL
MC: (Light Purple) 200 g (7 oz)/350 m (390 yds)
A: (Dark Purple) 230 g (8 oz)/405 m (450 yds)
B: (Blue) 150 g (5.25 oz)/265 m (295 yds)
C: (Green) 120 g (4.25 oz)/210 m (235 yds)
D: (White) 70 g (2.5 oz)/125 m (135 yds)
E: (Pink) 70 g (2.5 oz)/125 m (135 yds)

INSTRUCTIONS
The instructions are written for smallest size. If changes are necessary for larger sizes the instructions will be written thus ( ).
Notes: Turning ch 2 does not count as stitch.
To change colors, work to last 3 loops on hook. Draw new color through to complete st and proceed in new color.

Stripe Pattern
With B, work 2 rows.
With C, work 2 rows.
With D, work 2 rows.
With B, work 2 rows.
With MC, work 2 rows.
With A, work 2 rows.
With E, work 2 rows.
With A, work 2 rows.
With MC, work 2 rows.
These 18 rows form Stripe Pat.

BACK
**Sizes XS/M and L/2XL only: With smaller hook and A, ch 76 (90).
Size 3XL/5XL only:With larger hook and A, ch 106.
All Sizes: 1st row: (RS). 1 hdc in 3rd ch from hook (counts as hdc). 1 hdc in each ch to end of ch. Turn. 74 (88-104) hdc.
2nd row: Ch 2. 1 hdc in each hdc across. Turn.
Beg with 1st row of Stripe Pat, proceed as follows:
3rd row: Ch 2. 1 hdc in first hdc. (Yoh and draw up a loop in next st) twice. Yoh and draw through all loops on hook– Hdc2tog made. 1 hdc in each hdc to last 3 sts. Hdc2tog over next 2 sts. 1 hdc in last hdc. Turn.
4th to 6th rows: Ch 2. 1 hdc in each st across. Turn.
Rep last 4 rows 4 (2-2) times more. 64 (82-98) sts.
Next row: (RS). Ch 2. 1 hdc in first hdc. Hdc2tog over next 2 sts. 1 hdc in each hdc to last 3 hdc. Hdc2tog over next 2 hdc. 1 hdc in last hdc. Turn.
Next row: Ch 2. 1 hdc in each st across. Turn.**
Rep last 2 rows 6 (11-15) times more. 50 (58-66) sts.
Shape shoulders: 1st row: (RS). Ch 1. 1 sc in each of first 2 (2-3) hdc. 1 hdc in each hdc to last 2 (2-3) hdc. 1 sc in each of last 2 (2-3) hdc. Turn.
2nd row: Sl st in each of first 2 (2-3) sc. 1 sc in each of next 2 (2-3) hdc. 1 hdc in each hdc to last 2 (2-3) hdc. 1 sc in each of last 2 (2-3) hdc. Turn. Leave rem sts unworked.
Rep last 2 rows once more.
5th row: Ch 1. 1 sc in each of first 2 (3-3) hdc. 1 hdc in each hdc to last 2 (3-3) hdc. 1 sc in each of last 2 (3-3) hdc. Turn. Leave rem sts unworked.
6th row: Sl st in each of first 2 (3-3) sc. 1 sc in each of next 2 (3-3) hdc. 1 hdc in each hdc to last 2 (3-3) hdc. 1 sc in each of last 2 (3-3) hdc. Fasten off. Place marker at each end of center 26 (30-30) sts.

FRONT
Work from ** to ** as given for Back.
Rep last 2 rows 1 (6-9) time(s) more. 60 (68-78) sts.
Keeping cont of Stripe Pat, proceed as follows:
Next row: (RS). Ch 2. 1 hdc in first hdc. Hdc2tog over next 2 sts. 1 hdc in each hdc to last 3 hdc. Hdc2tog over next 2 hdc. 1 hdc in last hdc. Turn. 58 (66-76) sts.

Divide for front: Next row: Ch 2. 1 hdc in each of next 28 (32-37) hdc. Turn. Leave rem sts unworked.
Next row: Ch 2. 1 hdc in each hdc to last 3 hdc. Hdc2tog over next 2 hdc. 1 hdc in last hdc. Turn.
Next row: Ch 2. 1 hdc in each hdc across. Turn.
Rep last 2 rows 2 (2-3) times more. 25 (29-33) sts.
Next row: (RS). Ch 2. 1 hdc in each hdc to last 3 hdc. Hdc2tog over next 2 hdc. 1 hdc in last hdc. Turn.
Shape Neck: Next row: Ch 2. 1 hdc in each hdc to last 9 hdc. Hdc2tog over next 2 hdc. 1 hdc in next hdc. Turn.
Leave rem sts unworked. 17 (21-25) sts.

Shape Shoulder: 1st row: (RS). Ch 2. 1 hdc in first hdc. Hdc2tog over next 2 hdc. 1 hdc in each hdc to last 2 (2-3) hdc. 1 sc in each of last 2 (2-3) hdc. Turn.
2nd row: Sl st in each of first 2 (2-3) sc. 1 sc in each of next 2 (2-3) hdc. 1 hdc in each hdc to last 3 hdc. Hdc2tog over next 2 hdc. 1 hdc in last hdc. Turn.
Rep last 2 rows once more.
5th row: Ch 2. 1 hdc in first hdc. Hdc2tog over next 2 hdc. 1 hdc in each hdc to last 2 (3-3) hdc. 1 sc in each of last 2 (3-3) hdc. Turn. Leave rem sts unworked.
6th row: Sl st in each of first 2 (3-3) sc. 1 sc in each hdc across. Fasten off.
Shape left front:With WS of work facing, miss next 2 hdc. Join
appropriate color with sl st to next hdc. Ch 2. 1 hdc in each hdc across. Turn. 28 (32-37) sts.
Next row: Ch 2. 1 hdc in first hdc.
Hdc2tog over next 2 hdc. 1 hdc in each hdc across. Turn.
Next row: Ch 2. 1 hdc in each hdc across. Turn.
Rep last 2 rows 2 (2-3) times more. 25 (29-33) sts.
Shape neck: Next row: (RS). Ch 2. 1 hdc in first hdc. Hdc2tog over next 2 hdc. 1 hdc in each hdc to last 6 hdc. Turn. Leave rem sts unworked.
Next row: Ch 2. 1 hdc in next hdc. Hdc2tog over next 2 hdc. 1 hdc in each hdc across. Turn. 17 (21-25) sts.
Shape shoulder: 1st row: (RS). Ch 1. 1 sc in each of first 2 (2-3) hdc. 1 hdc in each hdc to last 3 hdc. Hdc2tog over next 2 hdc. 1 hdc in last hdc. Turn.
2nd row: Ch 2. 1 hdc in first hdc. Hdc2tog over next 2 hdc. 1 hdc in each hdc to last 2 (2-3) hdc. 1 sc in each of last 2 (2-3) hdc. Turn. Leave rem sts unworked.
3rd row: Sl st in each of first 2 (2-3) sc. Ch 1. 1 sc in each of next 2 (2-3) hdc. 1 hdc in each hdc across to last 2 (2-3) hdc. Hdc2tog over next 2 hdc. 1 hdc in last hdc. Turn.
4th row: As 2nd row.
5th row: Sl st in each of first 2 (2-3) sc. Ch 1. 1 sc in each of next 2 (3-3) hdc. 1 hdc in each hdc across to last 3 hdc. Hdc2tog over next 2 hdc. 1 hdc in last hdc. Turn.
6th row: 1 sc in each hdc across to last 2 (3-3) sts. Fasten off.

FINISHING
Pin garment pieces to measurements.
Cover with a damp cloth leaving cloth to dry.
Beg at lower edge, sew side and shoulder seams, aligning neck edge of Front with marker on Back and matching stripes.

Placket and Neck Edging:
Note: For sizes XS/M and L/2XL use 6 mm hook. For size 3XL/5XL use 6.5 mm hook.
With RS of work facing, join MC with sl st to right front at base of front opening.
1st row: Work 9 (9-12) sc up right edge of front opening, 3 sc in corner, 15 sc up right front neck edge to shoulder seam, 26 (30-30) sc across back neck, 15 sc down left front neck edge, 3 sc in corner, and 9 (9-12) sc down left edge of front opening. Turn. 80 (84-90) sts.
2nd row: Ch 1. 1 sc in each sc to end of row, having 3 sc in corners. Join A. Turn.
3rd row: With A, ch 1. 1 sc in each sc to end of row, having 3 sc in corners. Fasten off.
Lap right side of placket over left and sew row ends of placket in position.

Wednesday, 19 June 2013

Lizzie's Summer Sunflower – Crochet Pattern


Project tip:
Crochet a bouquet! Make a few flowers at a time, cutting the dowels different lengths, to create a stunning bouquet.
STITCHES USED
Chain (ch)
Double crochet (dc)
Single crochet (sc)
Slip stitch (slip st)
SUNFLOWER Center With A, chain 4; join with slip st in first ch to form a ring.
Round 1: Ch 3, work 12 dc in ring; join with slip st in top of beginning ch-12 sts.
Round 2: Ch 1, sc in each st around; join with slip st in first sc.
Round 3: Ch 3, *2 dc in next 3 sts, dc in next st; repeat from * around; join with slip st in top of beginning ch-21 sts.
Round 4: Ch 1, sc in first st, *2 sc in next st, sc in next st; repeat from * around; join with slip st in first sc-31 sts.
Round 5: Ch 3, dc in each st around; join with slip st in top of beginning ch. Fasten off.
Tips and Comments: Stuff the head as much as you can and roll it around in you hands to shape it. Don't worry about the openness on the Gilded Age (gold) part, because the petals will cover this area. Red symbols on the diagram are just to make it easier to read and do not represent color changes.

Round 6: Join B by drawing up a loop in the top of the beginning ch of Round 5, ch 3, dc in each st around; join with sl st in top of beginning ch.
Round 7: Ch 3, *dc in next 2 sts, sk next st; repeat from * around to last st, dc in last st; join with sl st in top of beginning ch-21 sts. Fasten off.


Round 8: Join D by drawing up a loop in the top of the beginning ch of Round 7, ch 1, sc in each st around; join with sl st in first sc.
Round 9: Ch 1, *sc in next 2 sts, sk next st; repeat from * around; join with sl st in first sc-14 sts.
Round 10:
Ch 1, sc in next 2 sts, *sk next st, sc in next 2 sts; repeat from * around; join with sl st in first sc-10 sts.
Round 11: Ch 1, sc in each st around; join with sl st in first sc. Fasten off leaving an 18"/45.5cm tail.


THE PETALS

There are 4 rows of petals, alternating in colour. Petals 1 & 3 are stitched in Vicuna, 2 & 4 in Gilded Age.
Stitches Used Chain (ch) Double crochet (dc) Single crochet (sc) Slip stitch (slip st) Treble crochet (tr)
First Row of Petals Work with C.
Row 1: Ch 8, sc in second ch from hook, sc in next ch, dc in next 3 ch; leave remaining 2 ch unworked; do not turn-1 petal made. Do not fasten off. Repeat Row 1 eight more times-9 petals made. Fasten off leaving an 18"/45.5cm tail.
Second Row of Petals Work with B.
Row 1: Ch 11, sc in second ch from hook, sc in next ch, dc in next 5 ch, tr in next ch; leave remaining 2 ch unworked; do not turn-1 petal made. Do not fasten off. Repeat Row 1 eight more times-9 petals made. Fasten off leaving an 18"/45.5cm tail.
Third Row of Petals Work with C.
Row 1: Ch 16, sc in third ch from hook, sc in next 2 ch, dc in next 10 ch; leave remaining ch unworked, turn-13 sts.
Row 2: Ch 1, sc in next 12 sts, slip st in last st, turn-12 sc.
Row 3: Ch 1, skip slip st, sc in next 3 sc, dc in next 9 sc; do not turn-12 sts (1 petal completed). Do not fasten off. Repeat Rows 1¬-3 five more times-6 petals completed. Fasten off leaving an 18"/45.5cm tail.
Fourth Row of Petals Work with B.
Row 1: Ch 17, sc in second ch from hook, sc in next 2 ch, dc in next 12 ch; leave remaining ch unworked, turn-15 sts.
Row 2: Ch 1, sc in next 3 sts, dc in next 9 sts, sc in next 2 sts, slip st in last st, turn-14 sts (excluding slip st).
Row 3: Skip slip st, sc in next 3 sts, dc in next 11 sts; do not turn-14 sts (1 petal completed). Do not fasten off.
Repeat Rows 1¬-3 five more times-6 petals completed. Fasten off leaving an 18"/45.5cm tail.

Leaf (make 2)
With D, chain 17.
Row 1: Sc in second ch from hook and in each remaining ch across, turn-16 sc.
Row 2: Ch 1, sc in first sc, dc in next 11 sc, sc in next 4 sc, slip st in beginning ch (tip); ch 2 and pivot piece to work along opposite side of foundation ch, sc in first 4 ch, dc in next 11 ch, sc in next ch, turn-16 sts along each side of leaf, and ch-2 at tip.
Row 3: Ch 1, sc in first st, dc in next 10 sts, sc in next 5 sts, 2 sc in next 2 ch (tip); skip the sl st, sc in next 5 sts, dc in next 10 sts, sc in next st, turn-36 sts.
Row 4: Ch 1, sc in first st, dc in next 9 sts, sc in next 8 sts, ch 1 (tip), sc in next 8 sts, dc in next 9 sts, sc in last st. Fasten off leaving an 18"/45.5cm tail.

Stem (make 1)
Note: Make one stem for each sunflower, of desired length. Instructions are given for 18"/45.5cm stem, with changes for 20"/51cm, 22"/56cm, and 24"/61cm stems in parentheses. With D, chain 87 (92, 97, 102).
Row 1: Dc in 3rd ch from hook and in each remaining ch across, turn-85 (90, 95, 100) sts.
Row 2-4: Ch 2, dc in each st across, turn.
FINISHING
Assemble Stem Cut dowel to desired length. Using yarn needle and matching yarn, wrap crochet stem around dowel and sew the edges together. Leave the last 1"/2.5cm open. Sew across the lower edge of the stem to keep the dowel from slipping out. .. Add Leaves Using yarn tails, sew one leaf on each side of stem, about 5-7"/12.5-18cm down from the top of the stem. . .
Assemble Flower Head
First Ring of Petals Using yarn tail, sew the first row of petals around the flower center, aligning the lower edge of the petals with Round 6 (the first B colored round). TIP: When attaching the petals, bring the two ends together to form a circle, and sew the ends together. Then arrange the petals evenly around the flower head before sewing in place. This will help with spacing. . .
Second Ring of Petals Arrange the petals of the second row to fall between the petals of the first row. Using yarn tail, sew the lower edge of the second row of petals around the first row of petals.
Third and Fourth Ring of Petals Sew the next two rows of petals around the previous rings of petals in a similar manner. .
. .

Attach Stem to Sunflower Head Insert top of dowel into the hole in the back of the flower head. Pull crochet fabric up and over to cover the top of the dowel and sew in place. Using yarn needle, weave in all ends. . . . .


Tuesday, 18 June 2013

Bright & Beautiful Top Free Crochet Pattern


close up of Bright & Beautiful Top

Bright & Beautiful Top

Reminiscent of the sixties, this updated top is perfect over a bathing suit, over leggings or with your skinny jeans. Crochet it in bright colors as shown or chose neutral shades for subtle style.


Skill Level:  Intermediate

Click here to get the free pattern from Coats & Clark

Monday, 17 June 2013

Softee Chunky– Slipper Boots Crochet Pattern


Crochet a set of these slipper boots for every member of the family and put a few aside for guests, too! Shown in Bernat Softee Chunky.

Visit Bernat.com here.

SIZES
To fit children’s/adult’s shoe size:

Extra-Small: 3/4
Small: 5/6
Medium: 7/8
Large: 9/10
Extra-Large: 11/12
Finished foot length:
Extra-Small: 7½" [19 cm]
Small: 9" [23 cm]
Medium: 9½" [24 cm]
Large: 10½" [26.5 cm]
Extra-Large: 11½" [29 cm]

MATERIALS
Bernat® Softee® Chunky
(100 g/3.5 oz; 99 m/108 yds)
Sizes: XS S M L XL
28417 (Peony Pink) 2 2 2 2 3 balls
or
28607 (Glowing Gold)
or
28742 (Ultra Blue)
or
28223 (Grass)

Size 6.5 mm (U.S. K or 10½) crochet hook or size needed to obtain gauge.

GAUGE
9 sc and 10 rows = 4" [10 cm].

ABBREVIATIONS
www.bernat.com/abbreviations
Beg = Beginning.
Ch = Chain.
Rem = Remain(ing).
Rep = Repeat.
Rnd(s) = Round(s).
RS = Right side.
Sc = Single crochet.
Sl st = Slip stitch.
St(s) = Stitch(es).
WS = Wrong side.
Yoh = Yarn over hook.

INSTRUCTIONS
The instructions are written for smallest size. If changes are necessary for larger sizes the instructions will be written thus ( ). Numbers for each size are shown in the same color throughout the pattern. When only one number is given in black, it applies to all sizes.
Sole
Beg at heel, ch 4.
1st row: (RS). 1 sc in 2nd ch from hook. 1 sc in each of next 2 ch. 3 sc. Turn.
2nd row: Ch 1. 2 sc in first sc. 1 sc in each sc to last sc. 2 sc in last sc. Turn.
Rep last row 1 (1-1-1-2) time(s) more. 7 (7-7-7-9) sc.
Next row: Ch 1. 1 sc in each sc to end of row. Turn.
Rep last row until work from beg measures 6½ (7-7½-8- 9)" [16.5 (18-19-20.5-23) cm], ending with a WS row.
Shape toe: 1st row: Ch 1. Draw up a loop in each of next 2 sts. Yoh and draw through all 3 loops on hook – sc2tog made. 1 sc in each sc to last 2 sc. Sc2tog. Turn.
Rep last row 1 (1-1-1-2) time(s) more. 3 sc. Fasten off.

Upper
Beg at toe, ch 4.
1st row: (RS). 1 sc in 2nd ch from hook. 1 sc in each of next 2 ch. 3 sc. Turn.
2nd row: Ch 1. 2 sc in each sc to end of row. 6 sc. Turn.
3rd row: Ch 1. 2 sc in first sc. 1 sc in each sc to last sc. 2 sc in last sc. Turn.
Rep last row 4 (4-5-5-6) times more. 16 (16-18-18-20) sc.
Next row: Ch 1. 1 sc in each sc to end of row. Turn.
Rep last row until work from beg measures 4 (-4½-5- 5½)" [10 (11.5-11.5-12.5-14) cm], ending with a WS row.
Divide for leg opening: Left side: 1st row: (RS). Ch 1. 1 sc in each of first 6 (6-7-7-8) sts. Sc2tog. 7 (7-8-8-9) sts. Turn.
Leave rem sts unworked.
2nd row: Ch 1. 1 sc in each sc to end of row. Turn.
3rd row: Ch 1. 1 sc in each sc to last 2 sc. Sc2tog. Turn.
Rep last 2 rows 1 (1-1-1-2) time(s) more. 5 (5-6-6-6) sts.
**Next row: Ch 1. 1 sc in each sc to end of row. Turn. Rep last row until work from beg measures 8½ (9-9½-10- 11)" [21.5 (23-24-25.5-28) cm], ending with a WS row.
Fasten off.**
Right side: With RS facing join yarn with sl st to rem 8 (8- 9-9-10) sc.
1st row: (RS). Ch 1. Sc2tog over same sc as last sl st and next sc. 1 sc in each sc to end of row. Turn.
2nd row: Ch 1. 1 sc in each sc to end of row. Turn.
Rep last 2 rows 1 (1-1-1-2) time(s) more. 5 (5-6-6-6) sts.
Work from ** to ** as given for Left side.
Sew center back seam.

Leg
Join yarn with sl st to Upper at center back seam.
1st rnd: Ch 1. Work 24 (26-28-30-32) sc evenly around leg opening. Join with sl st to first sc.
2nd rnd: Ch 1. 1 sc in each sc around. Join with sl st to first sc.
Rep last rnd until Leg measures 6 (-7--8)" [15 (16.5- 18-19-20.5) cm].
Fasten off.
Join Upper and Sole: With RS facing, join yarn with sl st at center back seam of Upper. Working through both thicknesses, work 1 rnd of sc evenly around outer edge. Join with sl st to first sc. Fasten off.

Sunday, 16 June 2013

Amaryllis Cowl – Crochet Pattern

From Naturallycaron.com

FINISHED MEASUREMENTS

Cowl measures approximately 50"/127cm circumference x 17 1/2"/44.5cm wide

GAUGE

In broomstick pattern, 20 sc (4 groups of 5 loops) and 9 rows = 6"/15cm;

Gauge is not critical for this project.

STITCHES USED

Chain (ch), half double crochet (hdc), single crochet (sc), slip stitch (sl st)

SPECIAL STITCHES

Fsc: Foundation single crochet (This technique creates a foundation chain and a row of single crochet stitches in one) –

Step 1:Place a slip knot on hook, ch 2, insert hook in 2nd ch from hook and draw up a loop; yarn over and draw through one loop on hook (the "chain"); yarn over and draw through 2 loops on hook (the "single crochet").

Step 2:The following stitch is worked under the forward 2 loops of the stem of the previous stitch (into the "chain"). Insert hook into the face of the "chain" and under the nub at the back of the "chain", draw up a loop, yarn over and draw through one loop on hook (the "chain"), yarn over and draw through 2 loops on hook (the "single crochet"). Repeat for the length of foundation.

SPECIAL TECHNIQUES

Broomstick Lace (worked in rounds)—Broomstick lace, worked in rounds, is made with the use of two large gauge knitting needles to hold all the loops. Each needle holds one half of the loops in a round. Using a crochet hook, the loops are held together in groups and worked off the needles with regular crochet stitches. This pattern uses groups of 5 loops, with 5 sc worked into each group. 

For this particular Broomstick technique, the needle is held to the left (for right-handed crocheters), and the two steps (loop pass and return pass) are worked with RS facing. In the first step you may need to snug up each loop after slipping it to the needle in order to keep all the loops as even as possible, but do not tighten the loops too much.  The loops on the needle should slide freely in order to be more easily worked off in the second step. To slip a loop from the crochet hook to the needle, bring the hook to the tip of the needle, transfer the loop from the hook to the needle without twisting, so the strand that lies to the front of the hook ends up at the front of the needle.

NOTES

1. The cowl is worked in broomstick lace worked in the round.

2. The same side (RS) of the piece faces you at all times; do not turn at the end of rounds.

COWL

Round 1: Leaving a 10"/25.5cm tail, Fsc 170; taking care to not twist sts, join with sl st in top of first sc made to form a ring, do not turn. Use beginning tail to sew lower edge of first Fsc to lower edge of final Fsc.

Note: If you prefer to begin cowl with a traditional foundation chain, work as follows: Ch 170; taking care to not twist ch, join with sl st in first ch to form a ring. Round 1: Ch 1, Sc in each ch around; join with sl st in first sc, do not turn—170 sc. Then proceed to Round 2 of instructions.

Round 2 (Loop Pass): With the first needle to the left, slip the last loop on hook onto the needle (counts as first loop). Working from left to right, skip the joining sl st, *insert crochet hook through back loop only of next sc, yarn over and draw up a loop long enough to fit over the needle. Slip the loop onto the needle, without twisting; repeat from * half way around, change to 2nd needle and repeat from * to end of round, do not turn—170 loops (total).

Round 3 (Return Pass): Insert empty hook from right to left in the first 5 loops on 2nd needle (the last of the 2 needles you placed loops on to). Holding the 5 loops in a group and working the group as one, slide the group off the needle (5 loops on hook). Bring yarn up to the level of the hook, yarn over and draw a loop through the group of 5 loops on hook (1 loop on hook), ch 1, working the group as one, work 5 sc in the same group. *ch 1, insert hook in next 5 loops on needle, slide group off the needle, yarn over and draw a loop through the group of 5 loops (2 loops on hook) yarn over and draw through both loops on hook (sc made), work 4 more sc in same group; repeat from * around working all loops off both needles; join with sl st in first sc—170 sc in 34 groups of 5 sc each, and 33 ch-1 sps.

Round 4 (Loop Pass): Working from left to right, sl st in back loop of first sc (last sc of previous round), slip the last loop on hook onto the needle. Working in sc sts only and skipping all ch-1 sps, *insert crochet hook through back loop only of next sc, yarn over and draw up a loop long enough to fit over the needle. Slip the loop onto the needle, without twisting; repeat from * half way around, change to 2nd needle and repeat from * to end of round, do not turn—170 loops (total).

Rounds 5–24: Repeat last 2 rounds 10 times.

Round 25: Repeat Round 3.

Round 26: Continuing from right to left, ch 2, working in back loops only, hdc in each sc and sl st in each ch around; join with sl st in top of beginning ch-2. Fasten off.

FINISHING

Using yarn needle, weave in all ends. Block lightly, if desired.