NOTES:
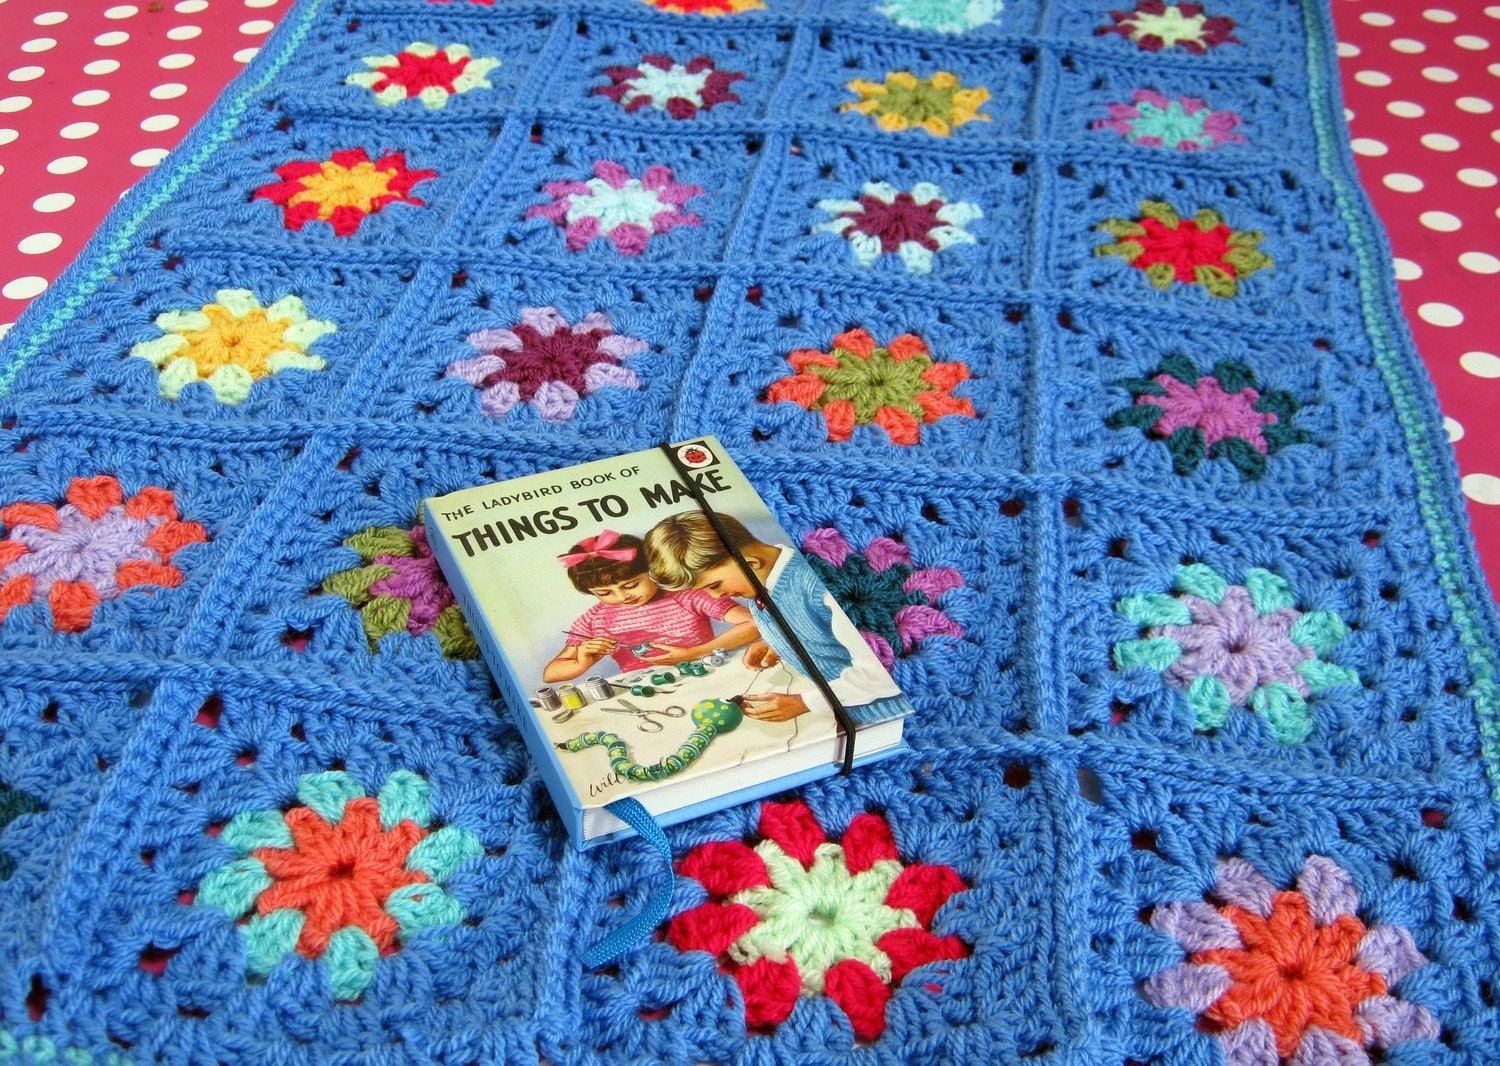
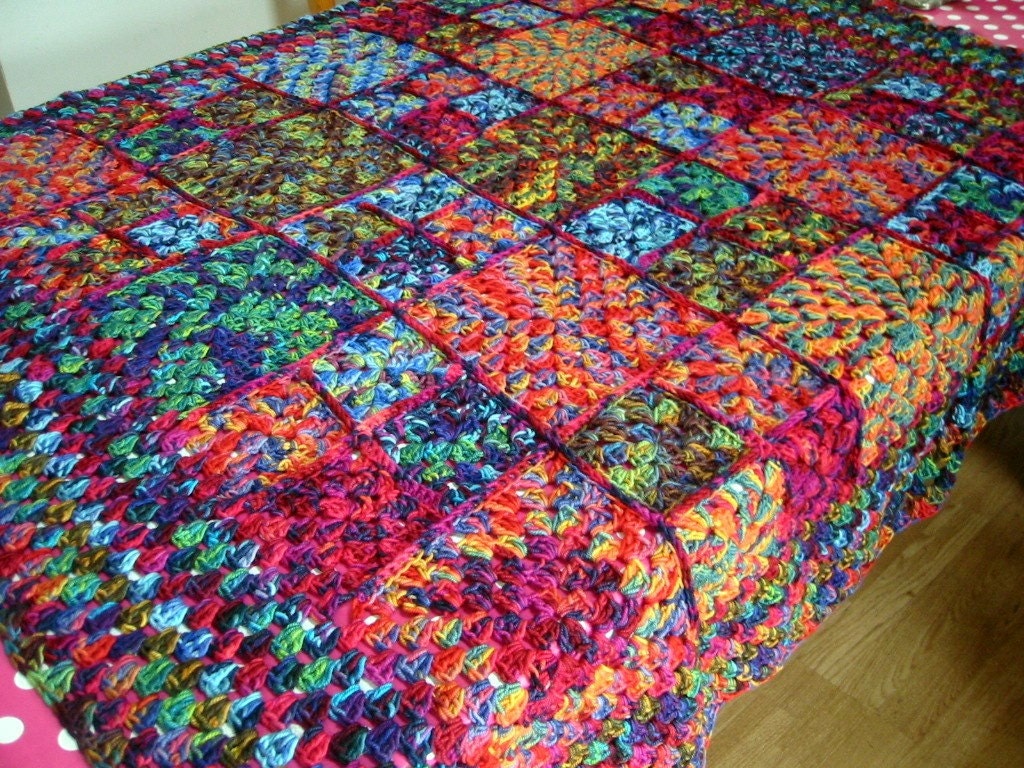
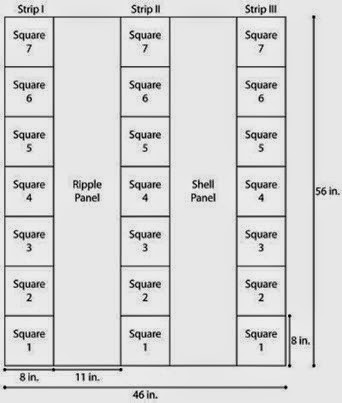
1. Afghan is made from 21 Squares (7 each of 3 different Squares), a Ripple Panel, and a Shell Panel.
2. Squares are worked in joined rounds, with RS always facing. Panels are worked back and forth in rows.
3. Squares and Panels are joined following the Assembly Diagram.
4. A border is worked around the outside edge of assembled Afghan.
Source - lionbrand.com click here.
SIZE: One Size
About 47 x 57 in. (119.5 x 145 cm), including border
STRIP I
Notes for Strip I1. Yarn color is changed on every rnd.
2. To change color, fasten off old color and join new color in any ch-2 sp.
Square 1 With B, ch 4; join with sl st in first ch to form a ring.
Rnd 1 (RS): Ch 3 (counts as first dc in this rnd and in all following rnds), 2 dc in ring, (ch 2, 3 dc in ring) 3 times, ch 2; join with sl st in top of beg ch – 12 dc (four 3-dc groups) and 4 ch-2 sps.
Fasten off B.
Rnd 2: From RS, join H with sl st in any ch-2 sp, ch 3, (2 dc, ch 2, 3 dc) in same sp (first corner made), *ch 1, (3 dc, ch 2, 3 dc) in next ch-2 sp (corner made); rep from * twice more, ch 1; join with sl st in top of beg ch – 24 dc (two 3-dc groups across each of 4 sides) and 4 corner ch-2 sps.
Fasten off H.
Rnd 3: From RS, join G with sl st in any ch-2 sp, ch 3, (2 dc, ch 2, 3 dc) in same sp, *ch 1, 3 dc in next ch-1 sp, ch 1, (3 dc, ch 2, 3 dc) in next ch-2 sp; rep from * twice more, ch 1, 3 dc in next ch-1 sp, ch 1; join with sl st in top of beg ch – 36 dc (three 3-dc groups across each of 4 sides) and 4 corner ch-2 sps
.Fasten off G.
Rnd 4: From RS, join D with sl st in any ch-2 sp, ch 3, (2 dc, ch 2, 3 dc) in same sp, *(ch 1, 3 dc in next ch-1 sp) twice, ch 1, (3 dc, ch 2, 3 dc) in next ch-2 sp; rep from * twice more, (ch 1, 3 dc in next ch-1 sp) twice, ch 1; join with sl st in top of beg ch – 48 dc (four 3-dc groups across each of 4 sides) and 4 corner ch-2 sps.
Fasten off D.
Rnd 5: From RS, join A with sl st in any ch-2 sp, ch 3, (2 dc, ch 2, 3 dc) in same sp, *(ch 1, 3 dc in next ch-1 sp) 3 times, ch 1, (3 dc, ch 2, 3 dc) in next ch-2 sp; rep from * twice more, (ch 1, 3 dc in next ch-1 sp, ch 1) 3 times, ch 1; join with sl st in top of beg ch – 60 dc (five 3-dc groups across each of 4 sides) and 4 corner ch-2 sps.
Fasten off A.
Rnd 6: From RS, join H with sl st in any ch-2 sp, ch 3, (2 dc, ch 2, 3 dc) in same sp, *(ch 1, 3 dc in next ch-1 sp) 4 times, ch 1, (3 dc, ch 2, 3 dc) in next ch-2 sp; rep from * twice more, (ch 1, 3 dc in next ch-1 sp) 4 times, ch 1; join with sl st in top of beg ch – 72 dc (six 3-dc groups across each of 4 sides) and 4 corner ch-2 sps.
Fasten off H.
Rnd 7: From RS, join B with sl st in any ch-2 sp, ch 3, (2 dc, ch 2, 3 dc) in same sp, *(ch 1, 3 dc in next ch-1 sp) 5 times, ch 1, (3 dc, ch 2, 3 dc) in next ch-2 sp; rep from * twice more, (ch 1, 3 dc in next ch-1 sp) 5 times, ch 1; join with sl st in top of beg ch – 84 dc (seven 3-dc groups across each of 4 sides) and 4 corner ch-2 sps.
Fasten off.
Square 2 Work same as Square 1, working 1 rnd each with C, F, G, D, A, F, and C.
Square 3 Work same as Square 1, working 1 rnd each with I, E, G, D, A, E, and I.
Square 4 Work same as Square 1, working 1 rnd each with H, B, G, D, A, B, and H.
Square 5 Work same as Square 1, working 1 rnd each with F, C, G, D, A, C, and F.
Square 6 Work same as Square 1, working 1 rnd each with E, I, G, D, A, I, and E.
Square 7 Work same as Square 1.
STRIP II
Notes for Strip II:1. Yarn color is changed after Rnd 2 and Rnd 4.
2. To change color, fasten off old color and join new color in any ch-2 sp.
Square 1 With C, ch 4; join with sl st in first ch to form a ring.
Rnd 1 (RS): Ch 3 (counts as first dc in this rnd and in all following rnds), 2 dc in ring, (ch 2, 3 dc in ring) 3 times, ch 2; join with sl st in top of beg ch – 12 dc (four 3-dc groups) and 4 ch-2 sps.
Rnd 2: Sl st in each st to next ch-2 sp, (sl st, ch 3, 2 dc, ch 2, 3 dc) in ch-2 sp (first corner made), *ch 1, (3 dc, ch 2, 3 dc) in next ch-2 sp (corner made); rep from * twice more, ch 1; join with sl st in top of beg ch – 24 dc (two 3-dc groups across each of 4 sides) and 4 corner ch-2 sps.
Fasten off C.
Rnd 3: From RS, join F with sl st in any ch-2 sp, ch 3, (2 dc, ch 2, 3 dc) in same sp, *ch 1, 3 dc in next ch-1 sp, ch 1, (3 dc, ch 2, 3 dc) in next ch-2 sp; rep from * twice more, ch 1, 3 dc in next ch-1 sp, ch 1; join with sl st in top of beg ch – 36 dc (three 3-dc groups across each of 4 sides) and 4 corner ch-2 sps
.
Rnd 4: Sl st in each st to next ch-2 sp, (sl st, ch 3, 2 dc, ch 2, 3 dc) in ch-2 sp, *(ch 1, 3 dc in next ch-1 sp) twice, ch 1, (3 dc, ch 2, 3 dc) in next ch-2 sp; rep from * twice more, (ch 1, 3 dc in next ch-1 sp) twice, ch 1; join with sl st in top of beg ch – 48 dc (four 3-dc groups across each of 4 sides) and 4 corner ch-2 sps.
Fasten off F.
Rnd 5: From RS, join A with sl st in any ch-2 sp, ch 3, (2 dc, ch 2, 3 dc) in same sp, *(ch 1, 3 dc in next ch-1 sp) 3 times, ch 1, (3 dc, ch 2, 3 dc) in next ch-2 sp; rep from * twice more, (ch 1, 3 dc in next ch-1 sp) 3 times, ch 1; join with sl st in top of beg ch – 60 dc (five 3-dc groups across each of 4 sides) and 4 corner ch-2 sps.
Rnd 6: Sl st in each st to next ch-2 sp, (sl st, ch 3, 2 dc, ch 2, 3 dc) in ch-2 sp, *(ch 1, 3 dc in next ch-1 sp) 4 times, ch 1, (3 dc, ch 2, 3 dc) in next ch-2 sp; rep from * twice more, (ch 1, 3 dc in next ch-1 sp) 4 times, ch 1; join with sl st in top of beg ch – 72 dc (six 3-dc groups across each of 4 sides) and 4 corner ch-2 sps.
Rnd 7: Sl st in each st to next ch-2 sp, (sl st, ch 3, 2 dc, ch 2, 3 dc) in ch-2 sp, *(ch 1, 3 dc in next ch-1 sp) 5 times, ch 1, (3 dc, ch 2, 3 dc) in next ch-2 sp; rep from * twice more, (ch 1, 3 dc in next ch-1 sp) 5 times, ch 1; join with sl st in top of beg ch – 84 dc (seven 3-dc groups across each of 4 sides) and 4 corner ch-2 sps.
Fasten off.
Square 2 Work same as Square 1, working Rnds 1 and 2 with G, Rnds 3 and 4 with D and Rnds 5-7 with B.
Square 3 Work same as Square 1, working Rnds 1 and 2 with H, Rnds 3 and 4 with E and Rnds 5-7 with I.
Square 4 Work same as Square 1, working Rnds 1 and 2 with A, Rnds 3 and 4 with F and Rnds 5-7 with C.
Square 5 Work same as Square 1, working Rnds 1 and 2 with B, Rnds 3 and 4 with D and Rnds 5-7 with G.
Square 6 Work same as Square 1, working Rnds 1 and 2 with I, Rnds 3 and 4 with E, and Rnds 5-7 with H.
Square 7 Work same as Square 1.
STRIP III Notes for Strip III: 1. Review the Adjustable Ring Technique before beginning.
2. To change color, fasten off old color and join new color where indicated.
Square 1 With A, make an Adjustable Ring.
Rnd 1 (RS): Ch 1, work 8 sc in ring; join with sl st in first sc.
Fasten off A.
Rnd 2: From RS, join I with sl st in any sc, ch 1, sc in same st, (ch 2, sc in next st) 7 times, ch 2; join with sl st in first sc – 8 sc and 8 ch-2 sps.
Fasten off I.
Rnd 3: From RS, join E with sl st in any ch-2 sp, ch 3 (counts as first dc in this rnd and in all following rnds), 2 dc in same sp, (ch 1, 3 dc in next ch-2 sp) 7 times, ch 1; join with sl st in top of beg ch – 24 dc (eight 3-dc groups) and 8 ch-1 sps.
Fasten off E.
Rnd 4: From RS, join A with sl st in any ch-1 sp, ch 3, dc in same ch-sp, *ch 1, sk next st, 2 dc in next st, ch 1, sk next st, 2 dc in next ch-1 sp; rep from * to last 3 sts, ch 1, sk next st, 2 dc in next st, ch 1, sk last st; join with sl st in top of beg ch – 32 dc (sixteen 2-dc groups) and 16 ch-1 sps.
Fasten off A.
Rnd 5: From RS, join I with sl st in any ch-1 sp, ch 1, sc in same sp, *ch 2, sc in next ch-1 sp; rep from * around, ch 2; join with sl st in first sc – 16 sc and 16 ch-2 sps.
Fasten off I.
Rnd 6: From RS, join E with sl st in any ch-2 sp, ch 3, 2 dc in same sp, *ch 1, 3 dc in next ch-2 sp; rep from * around, ch 1; join with sl st in top of beg ch – 48 dc (sixteen 3-dc groups) and 16 ch-1 sps.
Fasten off E.
Rnd 7: From RS, join A with sl st in any ch-1 sp, ch 1, sc in same sp, *ch 3, sc in next ch-1 sp; rep from * around, ch 3; join with sl st in first sc – 16 sc and 16 ch-3 sps.
Fasten off A.
Rnd 8: From RS, join I with sl st in any ch-3 sp, ch 1, 4 sc in same sp, (hdc, 3 dc) in next ch-3 sp, (tr, ch 2, tr) in next sc, (3 dc, hdc) in next ch-3 sp, *(4 sc in next ch-3 sp) twice, (hdc, 3 dc) in next ch-3 sp, (tr, ch 2, tr) in next sc, (3 dc, hdc) in next ch-3 sp; rep from * twice more, 4 sc in next ch-3 sp; join with sl st in first sc – 72 sts and 4 ch-2 sps.
Fasten off I.
Rnd 9: From RS, join E with sl st in first st following any ch-2 sp, ch 1, *sc in each st to next ch-2 sp, (sc, hdc, sc) in ch-2 sp (corner made); rep from * around; join with sl st in first sc – 84 sts.
Rnd 10: Ch 3, dc in next st, *dc in each st to next corner hdc, (dc, ch 2, dc) in hdc; rep from * 3 more times, dc in last st; join with sl st in top of beg ch – 88 dc (22 dc across each of 4 sides) and 4 corner ch-2 sps.
Fasten off.
Square 2 Work same as Square 1, working Rnds 1, 4 and 7 with A, Rnds 2, 5 and 8 with H, and Rnds 3, 6, 9 and 10 with I.
Square 3 Work same as Square 1, working Rnds 1, 4 and 7 with A, Rnds 2, 5 and 8 with E, and Rnds 3, 6, 9 and 10 with D.
Square 4 Work same as Square 1, working Rnds 1, 4 and 7 with A, Rnds 2, 5 and 8 with C, and Rnds 3, 6, 9 and 10 with B.
Square 5 Work same as Square 1, working Rnds 1, 4 and 7 with A, Rnds 2, 5 and 8 with E, and Rnds 3, 6, 9 and 10 with I.
Square 6 Work same as Square 1, working Rnds 1, 4 and 7 with A, Rnds 2, 5 and 8 with F, and Rnds 3, 6, 9 and 10 with G.
Square 7Work same as Square 1.
Joining Squares
Strip IFollowing Assembly Diagram, join Squares as follows:
Hold 2 neighboring Squares with WS tog and sts matching. From RS and working through both thicknesses, join A with sc in corner ch-2 sp at beg of edge to be joined, sc in same corner ch-2 sp, sc in each st across to next corner ch-2 sp, 2 sc in corner ch-2 sp.
Fasten off.
Rep to join rem Squares of Strip I, then rep to make Strips II and III.
RIPPLE PANEL
Notes for Ripple Panel:1. The ripple pattern is easy to do, but it's important to remember that you may need to work several rows before the ripple pattern becomes clear.
2. The ripple in this design is created by working dc3tog to form 'valleys' and 3 dc all in one st to form 'peaks'. In each row, take care to work dc3tog over the 3 sts in each 'valley' and 3 dc in the center dc of each 'peak.'
3. Yarn color is changed to make stripes. To change color, work last st of old color to last yarn over, yarn over with new color and draw through all loops on hook to complete st. Proceed with new color. Fasten off old color.
Stripe Sequence for Ripple Panel: Work *2 rows each with F, E, I, H, G, D and B, then 1 row each with F, E, I, H, G, D and B; rep from * until 82 rows have been completed, ending with the fourth rep of a single row of G as the last row you work.
With F, ch 42.
Row 1: Dc in 5th ch from hook, dc in next 3 ch, *3 dc in next ch, dc in next 5 ch, dc3tog, dc in next 5 ch; rep from * to last 6 ch, 3 dc in next ch, dc in next 5 ch – 3 ripples.
Row 2: Ch 1, turn, sk first st, sl st in next st, ch 3 (does not count as a st), dc in next 4 sts, *3 dc in next st, dc in next 5 sts, dc3tog, dc in next 5 sts; rep from * to last 6 dc, 3 dc in next st, dc in next 5 sts.
Change to E.
Rep Row 2 changing colors following Stripe Sequence until all 82 rows have been completed.
Change to D.
Filling Valleys
Next Row (RS): With D, ch 1, turn, sk first st, sl st in next st, ch 4 (does not count as a st), dc in next st, hdc in next st, sc in next st, sl st in next 2 sts, sk next st, sc in next st, hdc in next st, dc in next 2 sts, *tr3tog, dc in next 2 sts, hdc in next st, sc in next st, sl st in next 2 sts, sk next st, sc in next st, hdc in next st, dc in next 2 sts; rep from * to last dc, tr in top of beg ch.
Fasten off.
Filling Valleys along Foundation Row
Next Row (RS) From RS, working across opposite side of foundation ch, join B with sl st in ch at base of last st of Row 1, ch 1, sc in same ch, hdc in next ch, dc in next 2 ch, tr3tog, dc in next 2 ch, hdc in next ch, sc in next ch, *sl st in next 2 ch, sk next ch, sc in next ch, hdc in next ch, dc in next 2 ch, tr3tog, dc in next 2 ch, hdc in next ch, sc in next ch; rep from * end with sl st in last st.
Fasten off.
SHELL PANEL
Notes for Shell Panel: 1. Shell Panel is worked along one edge of Strip III.
2. Color is changed to form stripes.
To change color, work last st of old color to last yarn over, yarn over with new color and draw through all loops on hook to complete st. Proceed with new color. Fasten off old color.
Row 1: From RS and following Assembly Diagram, join A with sl st in corner ch-2 sp of Square I of Strip III, ch 1, sc in same sp, *(sk next 2 dc, Shell in next dc, sk next 2 dc, sc in next dc) 3 times, sk next 2 dc, Shell in next dc, sk next dc, sc in seam between Square; rep from * 5 more times, (sk next 2 dc, Shell in next dc, sk next 2 dc, sc in next dc) 3 times, sk next 2 dc, Shell in next dc, sk next dc, sc in corner ch-2 sp – 28 Shells.
Change to C.
Row 2: With C, ch 5 (counts as dc, ch 2), turn, sc in ch-1 sp of first Shell, ch 2, dc in next sc, *ch 2, sc in ch-1 sp of next Shell, ch 2, dc in next sc; rep from * across – 28 sc, 29 dc, and 56 ch-2 sps.
Row 3: Ch 3 (counts as dc), turn, 2 dc in same st, *sc in next sc, Shell in next dc; rep from * to last sc, sc in last sc, 3 dc in 3rd ch of beg ch-5 – 27 Shells and one 3-dc group at beg and end of row.
Change to H.
Row 4: With H, ch 1, turn, sc in first st, ch 2, dc in next sc, *ch 2, sc in ch-1 sp of next Shell, ch 2, dc in next sc; rep from * to last 3 dc, sk next 2 dc, ch 2, sc in top of beg ch.
Row 5: Ch 1, turn, sc in first st, *Shell in next dc, sc in next sc; rep from * across.
Change to G.
Rows 6 and 7: With G, rep Rows 2 and 3.
Change to A.
Rows 8 and 9: With A, rep Rows 4 and 5.
Change to C.
Rows 10 and 11: With C, rep Rows 2 and 3.
Change to B.
Rows 12 and 13: With B, rep Rows 4 and 5.
Change to D.
Rows 14 and 15: With D, rep Rows 2 and 3.
Change to A.
Rows 16 and 17: With A, rep Rows 4 and 5.
Change to C.
Rows 18 and 19: With C, rep Rows 2 and 3.
Change to F.
Rows 20 and 21: With F, rep Rows 4 and 5.
Change to A.
Rows 22 - 24: With A, rep Rows 2-4.
Fasten off.
FINISHING
Notes1. Follow Assembly Diagram while joining pieces.
If desired, pin pieces tog before joining.
2. When joining, you will be working through 2 thicknesses. After working a few sts, pause to examine your work. You may want to work more or fewer sts to make an attractive edge.
Join Strip II and Shell PanelHold Strip II and Shell Panel with WS tog and long edges matching. From RS and working through both thicknesses, join A with sc in first corner, sc evenly spaced all the way across the long edges.
Fasten off.
Join Strip II and Ripple Panel Hold Strip II and Ripple Panel tog with WS tog and long edges matching. With A, join in same way as previous joining.
Join Ripple Panel and Strip I With A, join in same way as previous joining.
BorderFrom RS, join A with sl st anywhere along outside edge of Afghan.
Rnd 1: Ch 1, work sc evenly spaced all the way around outer edge, working (sc, hdc, sc) in each corner; join with sl st in first sc.
Rnd 2: Ch 1, work rev sc around; join with sl st in first sc.
Fasten off.
Weave in ends.