googleads

Showing posts with label Authenticiy. Show all posts

Thursday, 18 August 2011

Comfort Blanket Campaign


The Knitter and Simply Knitting have put together a wonderful Ebook with a large selection of square designs to make a wonderful blanket.  For a small donation (I would suggest £5) this book could be yours there are over 20 different designs of written and charted patterns from Martin Storey, Alan Dart, Jenni Atkinson, Jane Crowfoot and Amanda Jones to name but a few.  The donation is for our charity of the year Refuge. Please see attached link to Just Giving page for Refuge,

Click here.

Friday, 16 April 2010

Ethical Mirasol Blanket Project

188-8803_IMG
Look at the absolutely exquisite colours in this embryonic blanket project. I think I could be in heaven and given this wool comes from such an ethical project makes me feel good too. I don’t want to lecture anyone about social responsibility and ethical consumerism as I think this yarn could make the argument for me. I have just received a variety of skiens of Mirasol Hacho and I’ve decided to be very selfish and make myself a huge blanket, throw, afghan.
188-8805_IMG
Here are some sneak preview shots of what I hope will become a magnificent piece of work when finally complete. I am also very lucky to have found what has become my favourite online yarn store. To visit the store pleas click here Aileen's Wool Shop. Those of you who know my name please don’t be confused this is not my shop but it is an incredible place to source a variety of ethical yarns such as Mirasol. The really competitively priced yarns include Artesano, Louise Harding, Debbie Bliss, Noro, Araucania, Colinette and Rowan. The shop also has all manner of knitting and crochet accessories.
I would highly recommend a visit to this store if you love quality yarns but don’t wish to pay top dollar. Aileen is a lovely lady and provides exceptional customer service, give it a try you’ll be delighted.
Aileen's Wool Shop
188-8801_IMG
I am writing up my pattern as I go and will publish it once completed. I will update regularly with progress photos. It’s so very exciting to work with such ethical and sublime yarn. For information on the Mirasol project click here.
187-8795_IMG
187-8796_IMG
187-8794_IMG
187-8797_IMG
187-8798_IMG

Friday, 9 April 2010

Circular Crochet Rag Rug – Instructions

175-7582_IMG
Circular Crochet Rag Rug Tutorial

This pattern is for a circular rag rug to illustrate the process of crocheting a rag rug in the round. Once you understand this concept you can then choose a variety of patterns to work with - ovals, squares, rectangles or even a hexagon.
A rag rug crochets up fairly quickly but the time consuming aspect is in the preparation. You will need to gather a variety of fabrics to cut and turn into your yarn. Think about the properties of any particular fabric you choose - is it stretchy, flexible, coarse, closely woven. Is it likely to fray? Although most fabrics do initially shed some fibres some materials are worse than others.
You will need a fairly large hook I always use 10mm but anything between 10mm and 15mm would be suitable. I find a 15mm hook a tad unwieldy in the hand.
Your next job is going to be to cut the yarn into strips with as few joins as possible. To avoid too many knots cut in a zigzag style from side to side or cut from out edge in a spiral manner to the centre. The fabric should be approximately 2cms wide or 1”. This measurement is not cast in stone and there will be slight variations in the width which is a natural property of any handmade crocheted rag rug. Roll the yarn into balls. It is difficult to estimate the amount of fabric required but I always find it is more than you might initially anticipate. If you prepare approx 5 different colours/patterns to begin with you should then be able to estimate how much more is required to complete the project.
If you are not used to using your hands intensively you may end up with aching hands during the cutting up stage - I think in my eagerness I even ended up with a blister or two. It is worth preparing the yarn in advance as it can become frustrating to have to stop crocheting to do more cutting up. It will also take a while to get used to working with such a large hook and fabric as it it is a very different experience to crocheting with yarn.
As you become more familiar with the process you will learn to assess which fabrics work best for you and your design. You will also learn when you need to make additional increases etc to stop the rug curling. The structure of a crocheted rag rug is synergistic each separate stitch is dependant upon all other stitches and the properties of the fabrics used.
175-7583_IMG1. Chain 3
 175-7585_IMG
2. Join the ring with a sl st, ch 1 and then sc x 5 into the ring, join the circle with a sl st.
175-7588_IMG
3. ch 1, (It may be useful at this stage to start marking the beginning of your round with a safety pin). sc x2 into each st,then join with a sl st.
175-7589_IMG 4. ch 1, *sc twice into next st, sc 1 in next st* ** rep to end, join with sl st.
175-7592_IMG
5. ch 1, *sc twice into next st, sc 1 in next st* ** rep to end, join with sl st.
175-7593_IMG
6. Now begin working in the round (no more ch at beg of row and no more sl st) *sc twice into next st, sc 1 in next st* ** rep to end.
175-7594_IMG7. Continue to use pin to mark your rounds. 1 sc into each st. 
175-7596_IMG
8. 1 sc into next 3 st, sc x2 into next st and every 4th st to end of round.
 176-7602_IMG
9. 1 sc into next 4 st, sc x2 into next st and every 5th st to end of round.
176-7603_IMG
10. Complete 1 round 1 sc in each st to end.
11. sc x 2 into 1 st, sc for next 3 st, sc next st and every 4th st to end of round.
12. Complete 1 round 1 sc in each st to end.
13. sc x 2 into 1 st, sc for next 3 st, sc next st and every 4th st to end of round.
14. Complete 1 round 1 sc in each st to end.
Continue with these rounds (13 & 14) until work measures required diameter.
At this point my rug measures 19” diameter.
176-7605_IMG
You can keep going here for as long as you like – but be warned they can become difficult to work with after a 4-5ft diameter.
170-7010_IMGHere is one of my earlier rugs and this reached approx 6ft.
Note: If your rug begins to wrinkle you are increasing too often – reduce amount of increase for 1 round.
If your rug begins to curl upwards, like a bowl you are not increasing enough. 
Happy Rug Making.

Wednesday, 24 March 2010

First Lessons in Crochet – Circa 1907

scan0011
Oooh I must be the luckiest girl I know a lovely lady has just given me this bound copy of a book called first lessons. The actual book contains 6 different copies of the Needlecraft Practical Journal.
Contents:
No 1. Crochet
No 2. Knitting
No 3. Plain Sewing
No 4. Darning and mending
No 5. Embroidery
No 6. Drawn Thread
This absolute gem is a real delight and pleasure to own. All of these ‘lessons’ were out of print at the time the book was bound and published and so I believe it to be extremely rare. I have done quite a bit of research and can find no reference to this 1st edition book nor any of the individual content chapters each of which would originally have been published as individual journals in 1906.
The book was originally written and published by the Manchester School of Embroidery, copies of some of the later Needlecraft Journals can be purchased on the internet but they appear to be years later.
If anyone knows anymore I would be delighted to hear your comments.
Sandra Thank You for letting me have this book.   

Monday, 15 March 2010

A Mirasol Mother’s Day

185-8572_IMG
I hope that all Mum’s, Mother’s, Ma’s, Mummy’s everywhere had a wonderful Mother’s Day. I was the lucky recipient of some sublime Mirasol yarn. It is too yummy for words really.
185-8570_IMG
I crocheted up a quick swatch to see how the yummy yarn would perform and it’s really excellent. The colours are beautiful and the wool itself is divine. Unfortunately I now feel a long term, time consuming and very expensive blanket, throw, afghan project coming on :-)
185-8571_IMG
The stitch definition is incredible and it’s wonderful to be working with such an ethical product. The sample here is Mirasol Hacho shade 317. If you are not familiar with the Mirasol project then click here.
The philosophy behind the Mirasol Project is very simple, the Mirasol Project supports local communities in Peru through the sales of the Mirasol Yarn Collection.
Peru’s heritage and culture of textile artistry is rich and ancient. The Mirasol Yarn Collection includes yarn made from the animals tended by these communities for generations in the Peruvian highlands. Without them we would not have this beautiful yarn.
I hope Mum’s everywhere were as lucky as me.

Friday, 26 February 2010

Call for Contributors – Create a Blog Dialogue

As many of you will know Anjie & I have been busy this month doing Thing-a-day. Now as we approach the end of February and the end of thing-a-day, We are inviting like minded crafty, artistic & creative people to join as a contributor to Create A Blog Dialogue.
This is a communal blog that I set up at the end of 2009 along with Anjie from Pompomemporium.com
We intended the blog to be a space to showcase current creative work as well a place to discuss, review and document the whole creative process in whatever medium. Hence ‘A Dialogue’  So we now cordially invite you to join us on our journey – you can comment, contribute and show case as often or as little as you want.
Please contact either myself via email at thesunroomuk@googlemail.com or contact Anjie via http://www.pompomemporium.com/  and we can add you as a contributor.

Process – The Initial Concept

Okay what exactly are we hoping to achieve here? I guess I should be blogging about it, as we go, then you can all follow what’s happening and what we are trying to create and achieve.
I first came across Anjie’s site during the summer and found a lot of her ideas to be very inspiring. I find when you work with others or at least bounce ideas off one another and feed each other inspiration new possibilities emerge and new directions can occur.  I also learned about ‘thing a day’ on Anjie’s site and this seemed like an excellent idea to me. I approached Anjie and asked if she would be interested in working on a blog format and dialoguing our creativity. The process is to undertake a creative activity every day for a month and thus instil the ‘habit’.
Now this may seem a bit strange as we both are regularly creative anyway. So to refine the concept even further another premise is to try new things that we wouldn’t normally try. Push the envelope, so to speak. Due to time commitments we have decided that January would be the best month to undertake the project. In the meantime we thought it would be good to blog about ideas, concepts, thoughts and plans.
I guess it’s like the stone in the pond, ripple effect. I may come up with a notion and blog it and Anjie may have a different take and inspire my creativity in a new direction. Rather than doing all our planning and debating offline (400 miles between us) or between private emails – we thought part of the process should be to blog from the start.
I/we also envisaged that we may just get other peoples creative habit going so they too could work on getting the habit. There is a school of thought in psychology that states that it only takes 6 weeks to establish or eradicate a learned behaviour. If that is the case or you but into that theory then perhaps it will only take a short while to develop the creative habit.

Thursday, 21 January 2010

The Queen Victoria Crochet Scarf Pattern

One of the Original Scarves made by Queen Victoria.
The Queen's Scarf of Honour
One of eight scarves Queen Victoria crocheted for presentation to members of her forces fighting in South Africa. This is the scarf awarded to Private R.R. Thompson on display at the Canadian War Museum.
In the last year of her long life, Queen Victoria crocheted eight scarves for presentation to members of her forces fighting in South Africa. Four were earmarked for members of colonial units, with one each going to "the most distinguished private soldier" serving in the forces of Canada, Australia, New Zealand and South Africa. The other four went to members of the British regular army. The Canadian scarf was awarded to Private R.R. Thompson for his actions in going to the aid of wounded comrades at Paardeberg on 18 and 27 February 1900.
With the passage of time, awareness of the scarf faded from Canadian memory. In 1964 Bombardier Kenneth Richardson, of the Royal Canadian Artillery, located the scarf with Thompson's family in Ireland. It was returned to Canada by Thompson's nephew in 1965, and has been on display at the Canadian War Museum ever since.
For further information click here.
182-8291_IMG This is my version of the scarf – albeit minus the tassels and in my mind a more appealing colour. I decided to create and document this pattern as it doesn’t seem to be documented elsewhere on the internet and could be a valuable educational resource for encouraging children to learn crochet :-)
Skill Level: Easy
Materials: 100g DK or worsted weight wool, 6mm crochet hook and darning needle.
Measurements: 8.25” x 54” approx.
Pattern:
ch 27 sts + 2
Row 1:  work three dc into 5th ch from hook, *sk 3 ch, work a dc three times into next ch*, ** rep to end.
Row 2: ch 3, *work 3 dc under next sp between triple dc cluster*, rep to end
Repeat row 2 until 82 rows are complete.
If adding tassels then on the original Queen Victoria crochet scarf they were 4” in length.
To Finish: darn all ends in.
This pattern is offered and made available for personal use only. If you wish to reproduce this in any way please contact me or make sure that reference is made to the original author’s blog http://www.goodtimesithinkso.blogspot.com/ Thank you
Crochet Conversion Chart US/UK
International Yarn Weight Conversion Chart
I hope you enjoy using this pattern and if you are looking for other free patterns please visit Crochet Pattern Central
For other exclusive patterns and my handmade creations please click here.

Tuesday, 19 January 2010

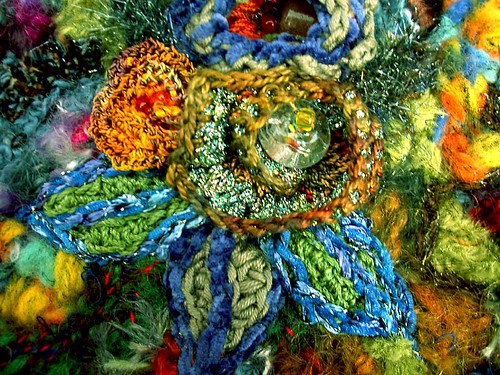
Freeform Crochet Necklace

Manos del Uruguay – Classica wool
100%  PURE WOOL
HAND SPUN & KETTLE DYED
in Uruguay by a non-profit organization, which assembles over 400 artisans in co-operatives, scattered throughout the countryside. The aim of the organization is to bring economic and social opportunities to rural women.
182-8266_IMG 182-8265_IMG 182-8262_IMG 182-8267_IMG

Saturday, 16 January 2010

Turtleneck Ribbed Crochet Cowl – Haiti Earthquake Appeal

182-8256_IMG
I have just produced this crochet pattern for a turtleneck ribbed cowl. The pattern is available to purchase through my Folksy store by clicking here.
I have designed this pattern in order to raise some money for the Haiti Earthquake Appeal please support me in this by purchasing the pattern here.
Thank you.
Alternatively please donate directly to DEC
We have to make the world a better place :-)

Friday, 8 January 2010

January Prayer Shawl Crochet


It’s been so ridiculously cold this past week that I decided to create a shawl that is warm and evocative of spring bulbs emerging. This shawl is shaped in such a way that it fits snugly on and around the shoulders giving the feeling of warmth, security and a fabric cuddle.
Materials:
300g Caledon Hills Worsted Wool – 881 Goldenrod
7mm crochet hook
Pattern:
ch 70 (+2) counts as first hdc
Row 1: hdc into each ch to end
Row 2: (Inc Row) ch 2, work 2 dc into 1st and last st, dc into all other sts
Row 3: (Inc Row) ch 1, work 2 hdc into 1st and last st, hdc into all other sts
Row 4: (Inc Row) ch 2, work 2 dc into 1st st and every 10th st, work one dc into all other sts
Row 5: (Inc Row) ch 1, work 2 hdc into 1st and last st, hdc into all other sts
Row 6: (Inc Row) ch 2, work 2 dc into 1st and last st, dc into all other sts
Row 7: (Inc Row) ch 2, work 2 dc into 1st st and every 10th st, work one dc into all other sts
Row 8: ch 1, hdc into all sts
Row 9: (Inc Row) ch 2, work 2 dc into 1st and last st, dc into all other sts
Row 10: (Inc Row) ch 2, work 2 dc into 1st st and every 10th st, work one dc into all other sts
Row 11: (Inc Row) ch 2, work 2 dc into 1st and last st, dc into all other sts and ch between each dc
Row 12 – 14: (Dec Rows) decrease at both sides on each row by ch 3, work 1 dc into 2nd ch sp at beg and end of each row. Continue to work 1 ch, 1dc throughout.
Row 15 – end: (Dec Rows) Continue to decrease at each end of every row and work straight dc without ch in between sts.

This pattern is offered and made available for personal use only. If you wish to reproduce this in any way please contact me or make sure that reference is made to the original author’s blog http://www.goodtimesithinkso.blogspot.com/ Thank you
Crochet Conversion Chart US/UK
International Yarn Weight Conversion Chart
I hope you enjoy using this pattern and if you are looking for other free patterns please visit Crochet Pattern Central
This shawl may be available in my store by clicking here.

Thursday, 31 December 2009